The Jungler's Role
In a League of Legends match, there are 5 positions to choose from: Top, Mid, AD Carry, Support, and Jungler. The characters on the top, mid and carry lanes have very similar roles in the game, they execute the troops on their lanes to earn gold and buy their items, in addition to slaughtering the enemy team's champions and towers.
The Jungler's role in a League of Legends match is to help other players, appearing in the lanes to force a summoner spell, an ultimate or even kill the opponent, creating an opening so that their team can kill more minions and earn more experience than your opponents.
This appearance of the Jungler in lanes is known as gank. Furthermore, they are also the ones who coordinate when the objectives on the map will be killed, namely: the Herald, Baron Nashor and the Dragons. In a League of Legends match, the position that has the greatest presence on the map is the Jungler, and in this article, we will address its particularities.
The Objectives of a Jungler
The first objective to appear in a LoL game is the Dragon, five minutes into the match, followed by the Herald, at eight minutes. There are seven different types of dragons; however, only six options can appear at the start of the match. The first two dragons are random, and killing the second will define which Rift variation will occur. Once the map type is defined, only the dragon from that element will spawn.
Dragons have a passive that deals 5% of current life as additional physical damage with each attack and penetrates 30% of the target's armor, except for the Chemtech drake, which only deals 4% of current life as damage. When they enter combat, dragons take flight and knock back all nearby champions.
For each dragon killed, the team receives a permanent improvement that varies depending on the dragon's element. The first team to kill four dragons receives the soul of the elemental dragon and, from then on, only the Elder Dragon can be born.
Jungle Camps and Objectives
Let's now understand a little more about the jungle camps and the creatures found in them!
Dragons & Rift Types in League of Legends
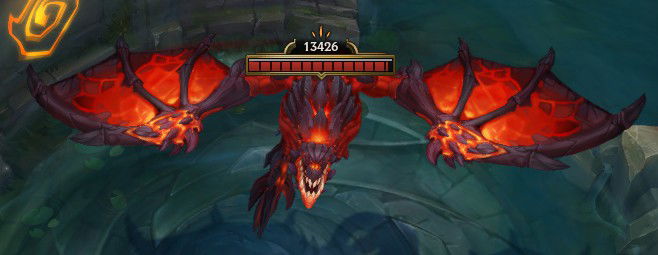
The Infernal Drake is the simplest of the seven, it has the second-highest base attack of the elemental dragons and can hit multiple champions at the same time, as its attacks hit players around the main target. To avoid receiving this damage, simply keep a small distance from whoever the dragon is focusing on.
Each infernal drake kill grants the Infernal Might to the team, with 3% attack damage and ability power boost. The Infernal Soul makes attacks and skills deal damage in an area that scales with attack damage, ability power and maximum life and has 3 seconds cooldown.
In the Infernal Rift, some jungle bushes disappear and new entrances appear in the Red Brambleback and Blue Sentinel spawn zones, in addition to increasing the entrance to the dragon's lair.
Despite seeming simple, the infernal drake's boost and soul are powerful and can easily change the course of matches, as they make it much easier to kill the opposing team thanks to the great damage that this dragon provides.
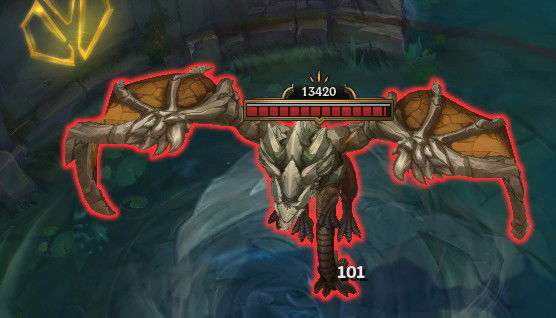
The Mountain Drake has the highest base damage among elemental dragons, the highest amount of armor and magical resistance, and can hit multiple targets similarly to the Infernal Drake. However, it attacks at half speed. To avoid receiving area damage, just don't stand behind the dragon's target.
Each mountain drake kill grants the Mountainous Vigor, a permanent 5% boost to armor and magic resistance. The Mountain Soul provides a permanent shield that increases with attack damage, ability power and maximum health, this shield recharges every 5 seconds without taking damage.
The Mountain Rift causes rocks to appear near the Red and Blue camps and creates passages behind the wolves and Krug camps.
The mountain drake's bonus and soul are very effective in the hands of champions who have a lot of damage but little defense, providing additional survivability for these characters.
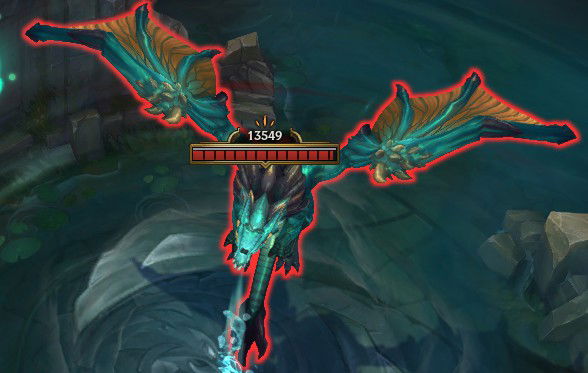
The Ocean Drake has very similar attributes to the Infernal Drake, with the addition of causing 30% slowness in each attack, however, it does not attack in an area. Due to its average attributes, it is not particularly a very dangerous dragon, but if the enemy team comes to compete its kill, this slowness becomes quite relevant, as it is quite difficult for the dragon's target to retreat or dodge abilities.
Each Ocean Drake kill grants the Oceanic Will, a permanent regeneration of 2% of lost health every 5 seconds, and its soul provides health and mana recovery when damaging enemy champions and minions.
The Ocean Rifts brings the appearance of multiple forests across the map, including inside the dragon’s lair. It allows carrying out ambushes if the enemy team has no vision of the location.
Among the other dragons, the Ocean Drake's bonus and soul are not as strong, as its effects are mitigated through healing reduction items, often purchased even if the enemy team doesn't have this soul.
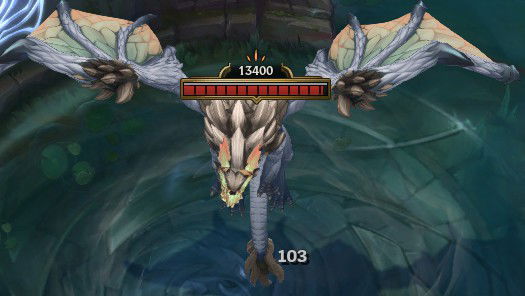
The Cloud Drake has the highest base attack speed, but its base damage is very low, and it does not attack in an area, so its biggest source of damage is its passive, which deals damage based on the target's current health.
Each Cloud Dragon kill grants the Cloudbringer's Grace, a 5% movement speed outside of combat and 5% slow resistance. The Cloud Soul grants a 20% increase in movement speed, increased to 50% for six seconds after using an ultimate ability.
The Clouds Rift brings the appearance of large zones around the Red and Blue camps, which increase the champions’ movement speed.
The cloud drake's bonus and soul are determining factors for the match, enabling rapid movement for the team that has it. Therefore, it becomes easier to contest objectives or carry out ambushes.
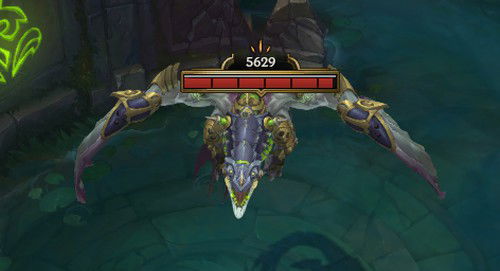
The Chemtech Drake has low base attack damage and doesn't attack in an area, but it has a passive that increases its attack speed the less health it has, up to a maximum of 200% increase. Even though it doesn't have high base damage, this dragon is quite lethal considering the passive of dealing damage according to the target's current health present in all dragons.
Each Chemtech drake kill grants the Chemtech Blight, a 6% increase to all healing and shield sources and tenacity, an attribute that reduces the duration of crowd controls such as slows and stuns. Its soul provides an 11% damage buff and 11% reduction on damage taken, but only when the champion is at less than half their health.
On the map, there are three types of plants: Blast Cones, Honey Fruits and Scryer's Blooms. The first is a red plant that, when attacked, throws nearby champions, the second is a green fruit that appears on the edges of the river and, when attacked, five fruits fall. These fruits restore health but cause slowness, and the third reveals a cone-shaped area on the map, showing hidden wards.
The Chemtech Rift is the improvement of all these plants across the map. The Blast Cones throws further, the Honey Fruits grants a shield beyond life and no longer causes slowness and the Scryer's Blooms now grants movement speed towards the revealed wards, in addition to leaving them with just one health point.
Even though the Chemtech bonus and soul are not the strongest, the modification to the map allows for creative moves such as running towards a Blast Cons to throw opponents or fighting near a Honeyfruit, relying on its healing and shield.
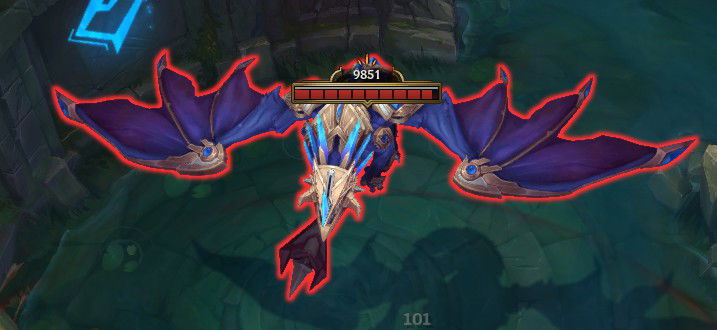
The Hextech drake has average damage and attack speed, however, every four attacks it launches a bolt of lightning that bounces off up to three targets, dealing damage and slowing 40%.
Each Hextech drake kill grants the Hextech Prowess, a 5% ability haste and 5% attack speed. The Hextech soul is very similar to the Infernal Soul, with the difference being in the recharge time and the area of damage, with 8 seconds of recharge time, and it does not hit in area, but it rebounds in up to three targets.
The Hextech Rift is the creation of portals that allow champions to cross from the entrance to the exit of the portals. The portals leave the bases to the Red and Blue camps, and there is also another pair of portals that can be used in any direction, crossing the river towards the objectives.
Both the bonus, soul and map modification brought by the Hextech dragon are excellent and have huge impacts on the gameplay. The dragon's soul is very similar to the Statikk Shiv item, being very useful for dealing a lot of area damage. Hextech portals provide quick movement around the map, enabling strategic repositioning for both teams.
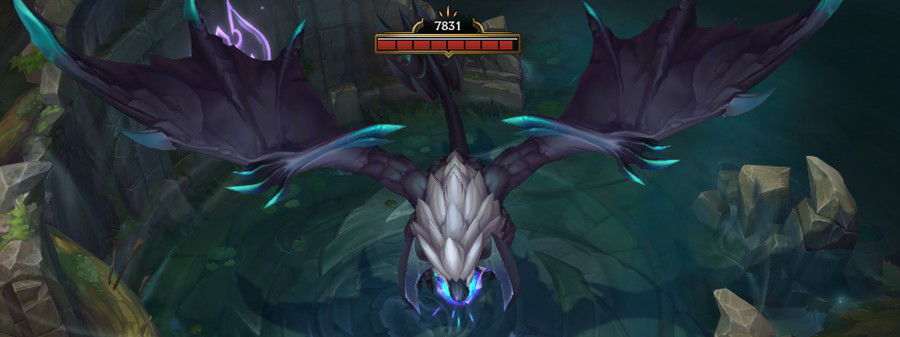
The Elder Dragon is born after a team obtains the dragon's soul, it has slightly higher base damage than the infernal drake, but it has a large amount of life, armor and magical resistance. After the elder dragon is born, no other type of dragon will appear and when killed, it grants all living champions on the team that killed it a bonus for 150 seconds.
When a champion with the Elder Dragon buff deals damage to an opponent, they will take 75 to 225 true damage over 2.25 seconds, and if that opponent reaches 20% health during that damage, they will be executed.
The elder dragon does not grant any permanent benefits or modify the map, but it is a very efficient way to end the game.
Scuttle Crab, Rift Herald and Baron Nashor
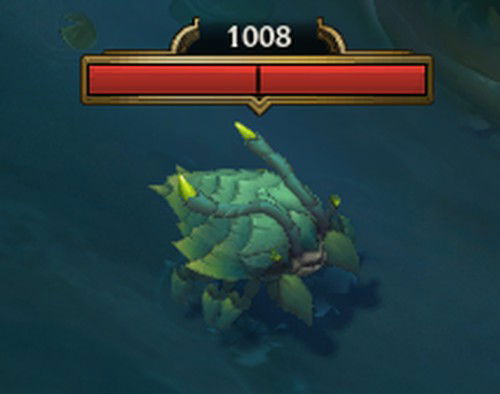
Unlike the other participants in this section, scuttle crabs aren't epic monsters, but neutral monsters. However, they play an important role in protecting and coordinating objectives.
At 3:30 of the matches, the crabs of the upper and lower half are born. After they are killed the first time, only one of them will respawn. The team that kills the crab will have a view of the entrance to one of the objectives. If the one in the upper part is killed, the view will be of the Baron's entrance, if it is in the lower part, it will be of the dragon's entrance.
In addition to this vision, the crabs create a small area in the river that provides the team that shot it with speed of movement in the area. These effects only last 90 seconds, but are very relevant for controlling objectives.
The first crabs of the match are very competitive, creating fights on the spot. If you are facing the enemy Jungler and the mid or top of your team has a wave of minions in their tower, it is better to leave that one to the enemy team and go towards the other. In a case like this, the top or mid of the enemy team can go towards the river, and you will be in a two-on-one situation.
This Jungle principle is called preference, and it determines that the team that has its waves of minions pulled can help the Jungler in completing an objective or prevent the player from the other team from contesting it. This principle is critical so that new Junglers can better visualize the situation at each lane and know when they can fight for an objective, or when they would just be dying unnecessarily.
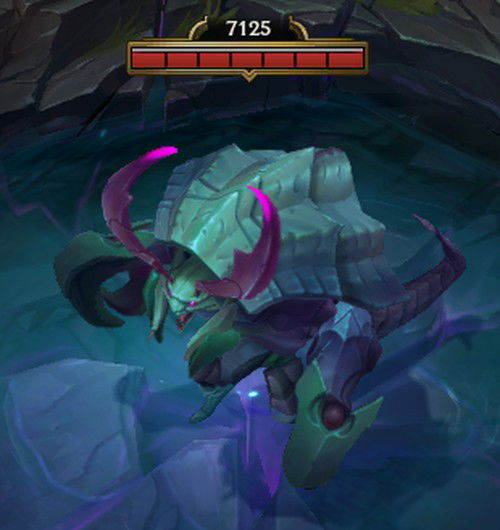
The Herald is the second objective to appear in the game, at eight minutes, but it is not uncommon to kill it before the first dragon, given how easy it is to do so.
When attacked, the herald starts the running animation with a headbutt, so you must get out of his way to avoid damage. Occasionally, the eye on its back opens and if you land an attack on it, they will take a lot of damage. This way, dodge the herald's abilities, hit its eye whenever possible and it will die quickly.
When killed, the Herald leaves its eye on the ground, which can be picked up by any champion on the team that defeated it. This item disappears if no one picks it up within 20 seconds and occupies the same location as the vision ward.
If the herald is killed before the 13:45 start time, a second herald will spawn after six minutes. Therefore, it is only possible to catch up to two heralds in the same game. After 19:45, or 19:55 if you are in combat, the herald disappears and gives way to the Baron.
When using the herald's eye, the champion channels for one second and summons a herald that heads to the nearest route to push it. When close to a structure, it uses the same headbutt attack to hit that structure. This attack deals 2000 true damage to the structure and the herald loses 66% of its current health. Therefore, it is a very efficient tool for tearing down structures, and cases in which the same herald delivers two or three headbutts are not uncommon.
It's not good for your team to take down inhibitors too early. If the inhibitor is destroyed too early and your team is unable to take advantage of this situation, you will be left without a route to collect resources, as this will be pulled by super minions for the next five minutes. After this time, the enemy inhibitor is reborn and the enemy team gains the advantage of having shot down all those waves of super minions in the comfort of their base.
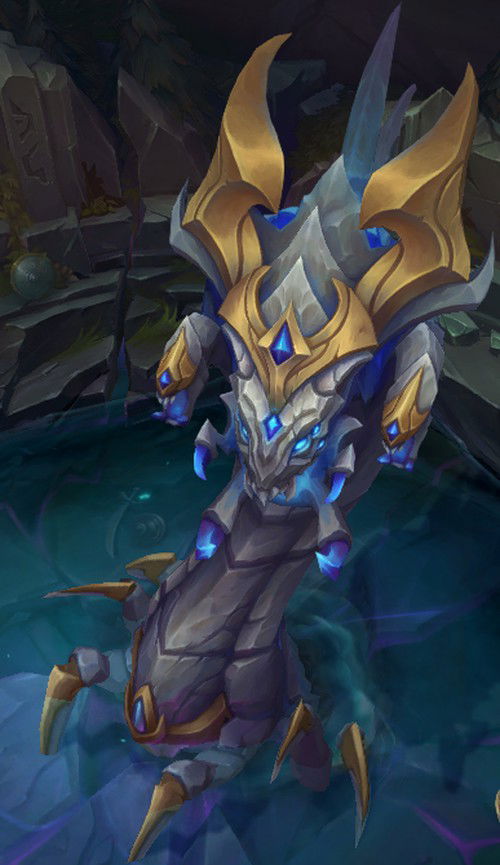
Baron Nashor is the most important epic monster in the game. When killed, it grants increased attack damage and ability power for 180 seconds, improves the return spell and strengthens minions close to the champions with this improvement.
As a powerful match finisher, Baron is a highly sought-after and difficult objective to complete. It first spawns 20 minutes into the match, but is rarely killed at this point. In general, the time to do the Baron is right after a successful fight in which your team still couldn't finish the game.
The Baron's skill kit includes melee and ranged attacks that have very similar damage. One of its biggest dangers is its passive of progressively reducing armor and magical resistance. Avoid getting behind the baron to avoid being stunned by its spike attack.
Its abilities consist of spitting poison in a straight line, which causes a lot of damage, but it's easy to dodge, creating three small pools of poison with damage and slowness, and an attack in a small circular area, where it throws the champions inside it upwards.
With the Baron's improvement, the team must apply as much pressure as possible on the routes so that the improved minions are used efficiently. In general, teams place one player in the top lane, three in the mid-lane and one in the bot. This strategy is popularly known as 1-3-1.
In this case, your team aims to protect the minion waves and destroy as many towers as possible without getting into a fight. This situation is known as Siege. Considering how the enhanced minions don't die easily, the enemy team will have trouble stopping them from destroying structures.
Jungle's Neutral Camps
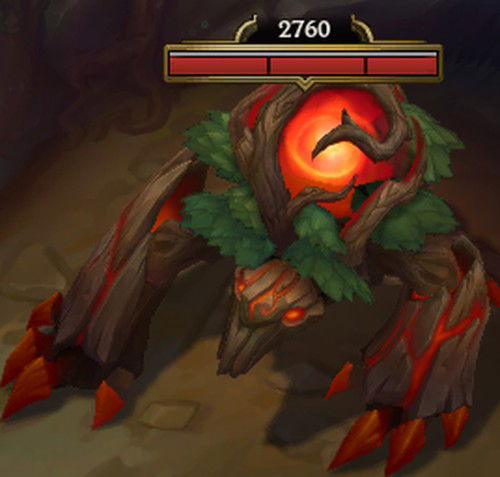
Red Brambleback, or Red, is an essential camp due to the bonus it grants when killed. With this, for two minutes, the Jungler's attacks cause damage over time and slow for two seconds. Additionally, while out of combat, the champion quickly recovers health. This effect is also lost upon death, and the champion who killed you earns the bonus for themselves. Red's respawn time is slightly longer than other neutral camps, taking five minutes to return.
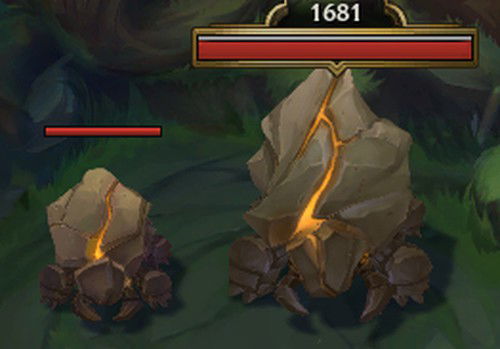
Krugs are small stone elementals and, when killed, they split into two smaller ones. Each camp has an ancient and a normal krug, the ancient one is divided into four mini krugs and the normal one into two. Mini krugs don't divide. The Krugs' camp follows the 2 minute, 15 second jungle respawn pattern.
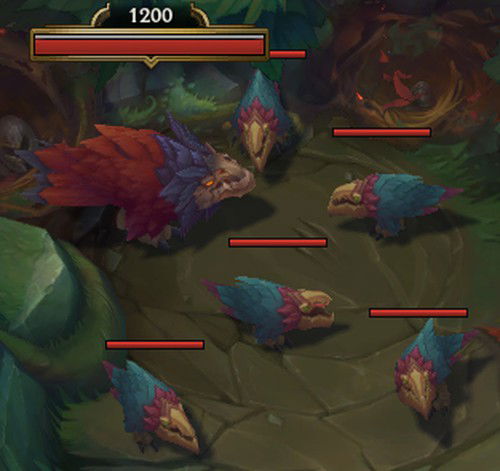
The Raptor camp is made up of a large bird-like monster and five smaller versions of it. In general, the strategy is to focus on the large bird and let area damage effects take care of the smaller ones. The Jungle pet is quite efficient at causing damage to them. The Raptor camp follows the 2 minutes and 15 seconds respawn pattern.
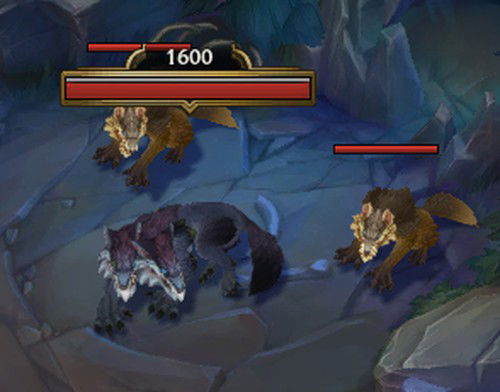
The Wolves camp is made up of one large wolf and two smaller ones. The strategy is similar to the Raptors, focusing on the biggest one that causes the most damage and then the smaller ones. The Wolves camp also follows the 2 minute and 15 second respawn pattern.
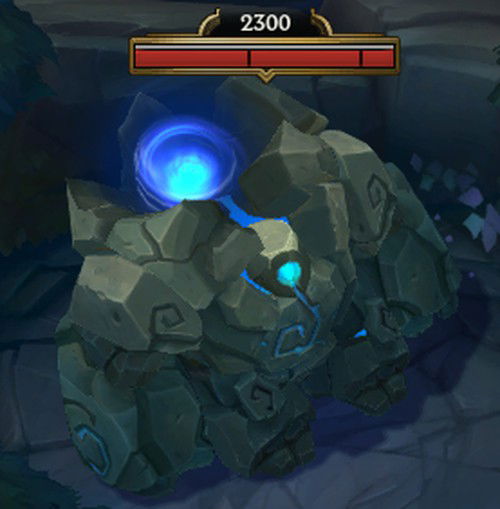
Blue Sentinel, or Blue, is also an important camp since its bonus gives the champion who killed it a skill acceleration and mana regeneration which has the same duration, transfer and respawn characteristics as the red bonus.
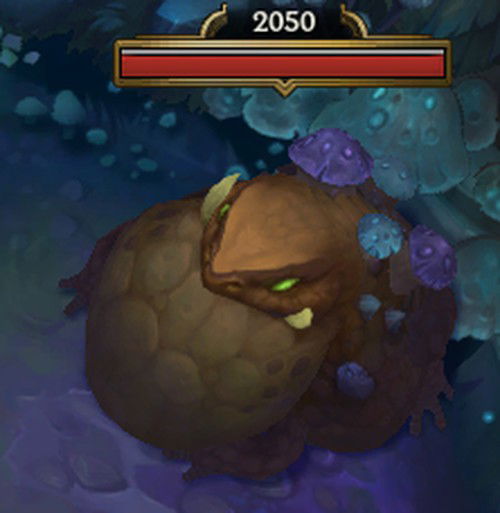
Gromp's camp is made up of a large frog-like monster, and its most considerable difference from other camps is its ranged attacks.
Playing in the Jungle
Once the player is selected for the jungle position, the game replaces one of the summoner spells with an attack which deals 600 true damage to neutral monsters and minions.
At the beginning of the game, there are three item options for the Jungler to start with: Gustwalker Hatchling, Mosstomper Seedling and Scorchclaw Pup. Each of them grants a different pet to accompany the jungler, it causes true area damage in the jungle camps and, if the champion has stopped attacking the camp, it attacks twice as much.
A habit of experienced junglers is to head to the next jungle camp when they know that their pet will finish off the remaining monsters, this requires a little practice, but saves a lot of time. Killing neutral monsters on the edge of their camps towards the next one is a widely used tool and speeds up the complete clearing of the jungle. This strategy is known as jungle kiting
Even though the game doesn't make it so clear, the jungle item amplifies damage to non-epic monsters, restores life and mana when killing a large monster and recovers mana while the jungler is inside the jungle or in the river.
There is also an internal game mechanic that provides more experience if the jungler is falling behind in levels, known as catchup experience. Its exact numbers were never disclosed, but it is essential to enable characters focused on Ganks.
Every minute, the game grants the jungle pet a bonus treat. Each large neutral monster killed offers a snack for the pet and, if the player has bonus treats, the item will consume one of these and deliver 20 additional gold to the player.
Offering 20 treats to the jungle pet evolves it into its intermediate form and the hit is improved to 900 true damage and can now be used against champions, also causing 20% movement speed reduction on the target, but with greatly reduced damage.
By offering 40 treats, the jungle pet evolves into its adult form and starts giving the player its specific ability, in addition to improving its hits to 1200 real damage.
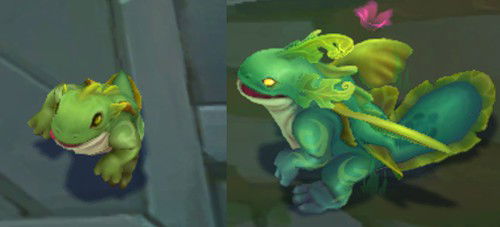
Mosstomper's specific ability is a permanent shield of 180 to 300 health, depending on the jungler's level, which recharges every ten seconds or after killing a jungle camp.
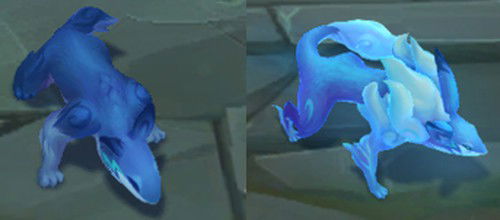
Gustwalker's specific ability is to grant the player a 30% increase in movement speed when passing through bushes. This ability is activated and amplified for two seconds if the player kills a jungle camp.
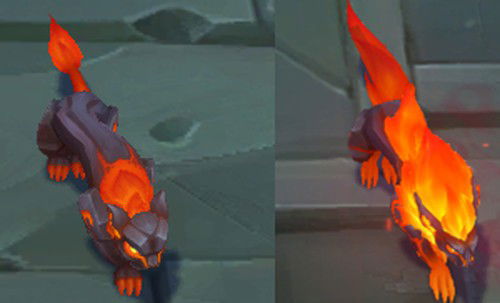
Scorchclaw's ability causes additional damage and slow down after a player's ability or attack, this ability is only activated every 15 seconds, or if the player kills a jungle camp.
The Mosstomper and the Gustwalker are the most used jungle pets thanks to their versatility in providing resistance or locomotion. However, some champions make great use of Scorchclaw's ability.
Once you have chosen your jungle pet, a very common way to start the match as a jungler is to kill the Red if you are part of the blue team or Blue in the case of the red team. The reason is the possibility of receiving help from the ADC and support to take down the first camp. In general, they help the jungler until the monster is at just under half health. This situation is popularly known as leash and can be done via the bot or the top routes. Once the first camp is killed, the jungler gains level 2.
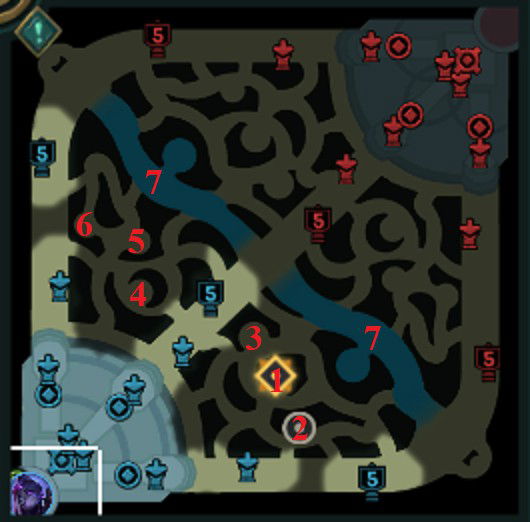
Starting with Red on the blue side, the most common route is to go to the krug camp, then the raptors, reaching level 3. After them, the jungler heads to the other part of the jungle and does the wolf camp, then Blue and the gromp. At this moment, the jungler reaches level 4.
The next step is the scuttler crabs and, to finish them safely, it is necessary to do a little analysis: if the enemy jungler is taking a route that directs them to the crabs at the bottom of the river, we can do the crabs from the top with no problems.
However, if you find the enemy jungler in the same crab camp, it is necessary to apply the preference principle that was explained in their section. If your team doesn't have a preference, leave them to the opponent and go to the other.
After the crab, it is usually time to return to base and make some items. Upon leaving the base, the jungler will head towards the krugs about to respawn, followed by the raptors, wolves and the gromp. This is the basic rotation of the jungle on the blue side, from that moment on, between the camps' respawn times, the jungler must fit ganks and objectives to guarantee the success of their team.
The route on the red side starts with Blue, then Gromp, wolves, raptors, Red, Krugs and crabs, being practically the mirrored route of the blue side.
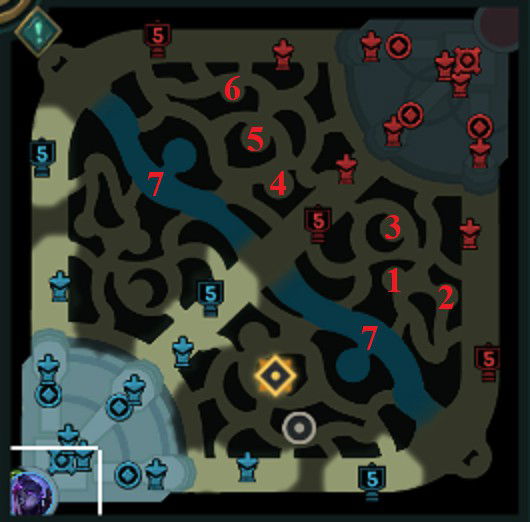
A useful tool for the jungle player is knowing how to deduce which and how many camps the enemy jungler has killed. This tool loses its effectiveness as the game progresses, but it is essential if used correctly. Initially, we have to understand that each killed jungle camp counts as 4 minions on the team screen accessed by the 'tab” or “o” button.
It is not rare for one of the junglers to Gank very early in the match, assuming that this Gank is in the top lane, and they have 12 farm and only the bonus on that side of the jungle. In this case, we can understand that they took the 3 camps in that part of the jungle, but has not yet slaughtered the other side.
In situations like this, it is possible to enter the opponent's jungle and steal one or two camps, depending on the time spent ganking. This action is known as invade and reduces the enemy jungler's ability to get experience and gold.
Jungler Champion Recommendations
Nocturne
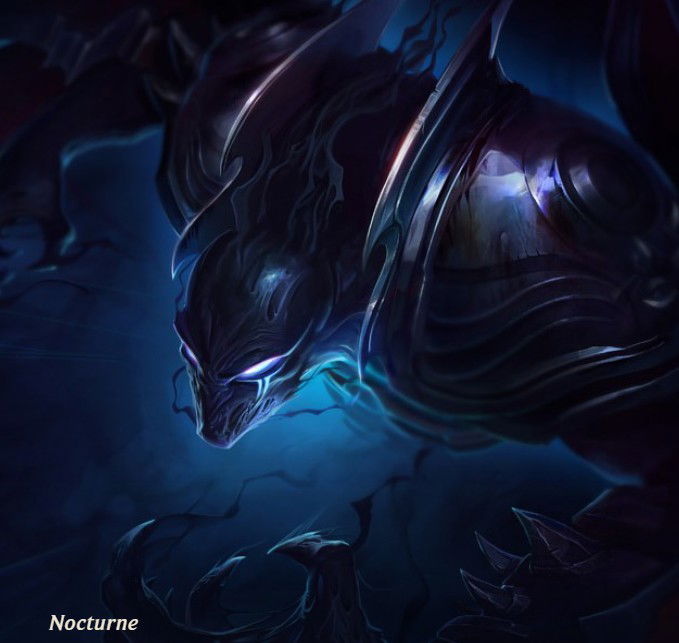
Nocturne is a champion with simple but very effective skills. His passive consists of an area attack that recovers life proportional to the damage caused. This ability lasts 12 seconds, but its cooldown is reduced by one second with each basic attack.
Nocturne's first ability casts a shadow that deals damage and latches onto all champions it hits. Champions affected by the shadow leave a trail on the map, which grants Nocturne movement speed towards them, in addition to granting extra attack damage.
His second ability is a shield lasting three seconds, capable of nullifying the next ability that hits him.
The third ability creates shackles, they cause fear in the enemy after two seconds if they aren't broken. The player loses control of their character for 2.25 seconds.
The ultimate is what defines Nocturne, and it is made up of 2 activations. The first leaves the map dark and reduces the visibility of all opposing champions. The second makes Nocturne fly to a target within its range and deal a lot of damage.
To play with Nocturne, I recommend the following items: Stridebreaker, Black Cleaver and Death's Dance.
Tips for playing Nocturne
When making jungle camps, avoid using the shadow towards the routes, as it passes through the walls and gives away your location.
To avoid ulting without having any champions in range, hover your mouse cursor over the ability to check its range.
While flying towards the enemy, Nocturne can use his other abilities. Using the shadow during the ultimate provides a huge increase in damage.
Jarvan IV
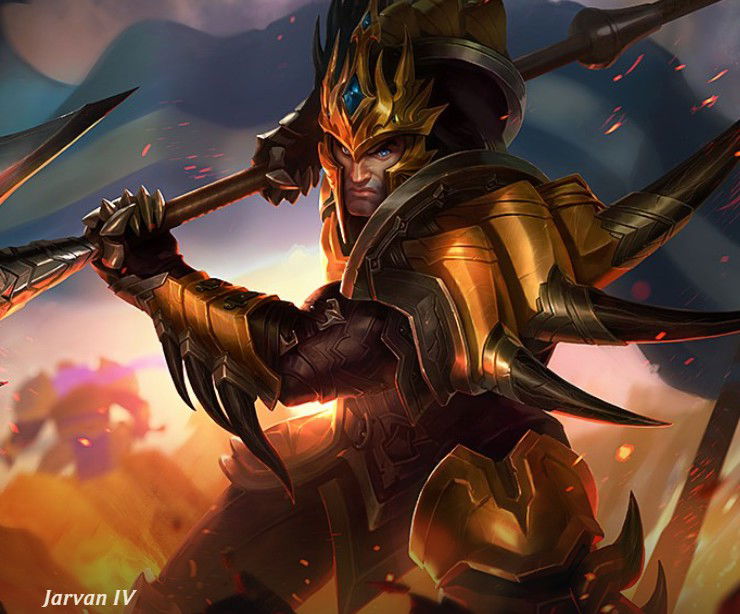
Jarvan IV is a champion focused on starting fights. His two-skill combo allows him to travel great distances rapidly. Because it has low cooldowns, Jarvan can apply successive ganks without worrying too much about falling behind, thanks to the catchup experience.
Jarvan's passive makes his attacks deal additional damage equal to 6% of the target's current health, but this effect cannot occur more than once every six seconds on the same target. Therefore, it is recommended that the player, when making jungle camps, apply a basic attack to each monster to use their passive efficiently.
Jarvan's first ability extends his spear in one direction, dealing damage and breaking the armor of all targets he hits.
The second skill is a shield proportional to the number of nearby enemies and slows all nearby targets by 15 to 35%.
The third ability is a banner he throws over long distances, and provides attack speed to all nearby allies. If Jarvan hits the banner with his first ability, he charges towards it, knocking all enemies in his path into the air.
Jarvan's ultimate ability should be used with caution. Jarvan jumps at a target, dealing heavy damage and creating a crater that traps everything nearby, including allies.
To play Jarvan IV, I recommend the following items: Goredrinker, Spear of Shojin and Black Cleaver.
Warwick
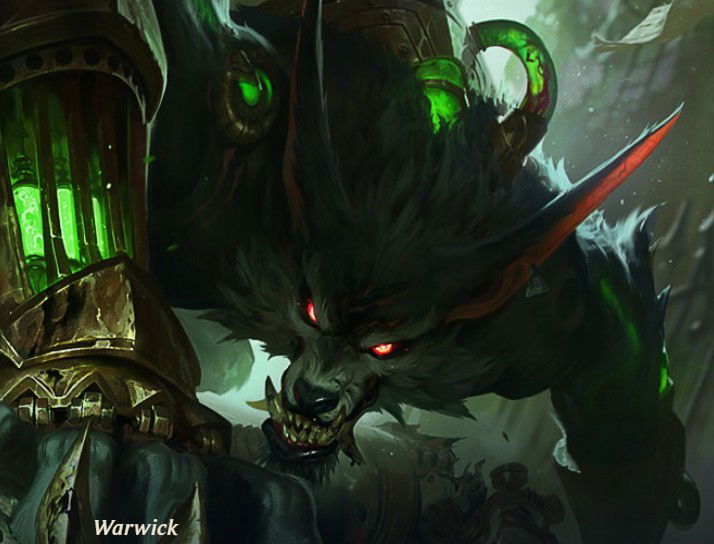
Warwick is a tank focused on life steal and movement speed. His passive heals with each basic attack and triples this value if Warwick is below 30% health.
His first ability has Warwick lunge at a target and bite it. If the player continues to hold “Q”, Warwick passes through the target. This ability can be used to track large enemy movements. For example, if Warwick uses his “Q” right before Jarvan advances on the banner, it will appear at the end of Jarvan's movement.
His second ability marks the targets with less than half health across the map, creating blood trails towards them. Warwick receives a large movement speed boost towards these targets. Additionally, Warwick gains attack speed proportional to the target's missing health.
His third ability is made up of two activations, the first reduces the damage taken by Warwick by 35% to 55% for 2.5 seconds, at the end, it causes fear to all nearby targets. This ability can be reactivated to finish sooner.
In his ultimate ability, Warwick jumps in a direction, suppressing a target for 1.5 seconds. Suppression is similar to stun, but its duration cannot be reduced by tenacity. The range of this ability increases with Warwick's movement speed.
To play Jarvan IV, I recommend the following items: Blade of the Ruined King, Jak'sho the Protean and Titanic Hydra.
Conclusion
The jungle route is undeniably one of the most complex and requires the most detail to master. However, it is also one of the most rewarding and influential routes in the game.
Playing well in the jungle is hard work, and it is often difficult to see the mistakes made, but it is with practice that you learn. If this guide helped you move up a level or if you felt there was any additional information missing, leave it in the comments.
Until next time!




— 评论 0
, 反应 1
成为第一个发表评论的人