Bind is one of Valorant's original scenarios, and consequently one of the best known. As it’s active in the game's map rotation, it’s possible to play in it in casual and competitive modes, so be prepared to play Cypher, knowing all the setups to improve your defense and attack.
This article is also important for fans of other agents if you are acting against a Cypher, since it’s always essential to understand what possible traps and smokes you may encounter.
With this in mind, we at UmGamer worked on a complete guide to show the setups and one ways used by the best Cypher players in Bind. Check it out!
Defending Side
Cypher setups on Bind's Bomb A
Setup 1
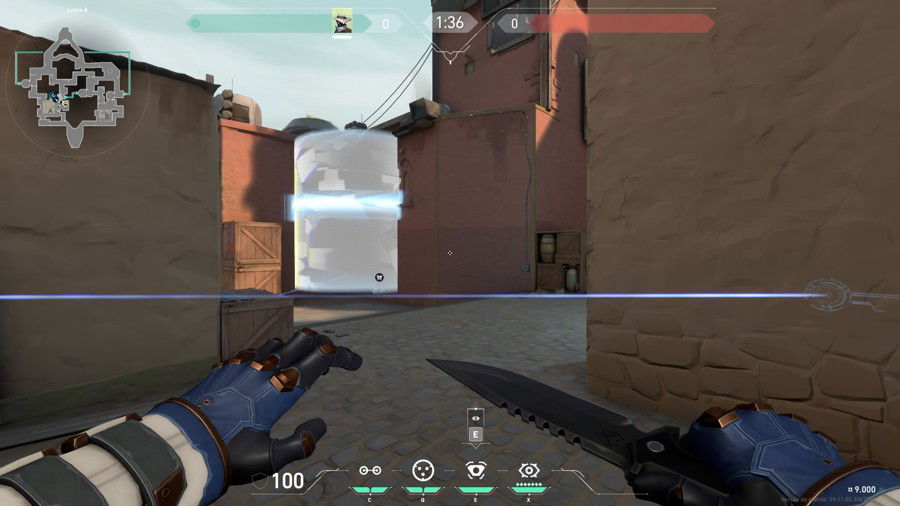
Although we don't invest any resources to protect the bath, which requires a companion there, Cypher manages to protect A's other entrance very well with this setup. Including a one way, this defense will really inhibit any entry from A short, including through the Lamps.
The camera here is used to spot enemies entering the bomb, in addition to detecting those who will hide behind the box, precisely where we placed the one way.
Check out how to do it in the video below:
Setup 2
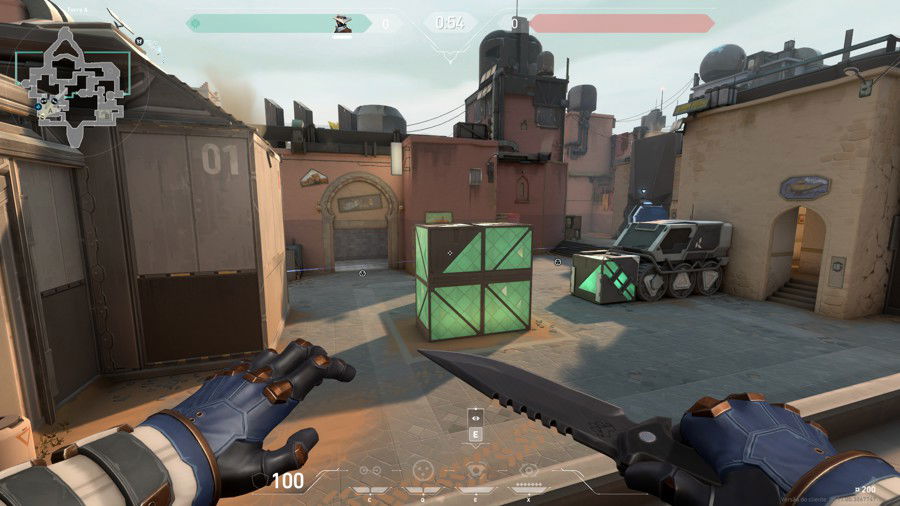
This positioning is capable of getting information from all of A's entries, and the smokes can slow down the enemies a little to give your team time to arrive and support.
Check out how to do it in the video below:
Setup 3
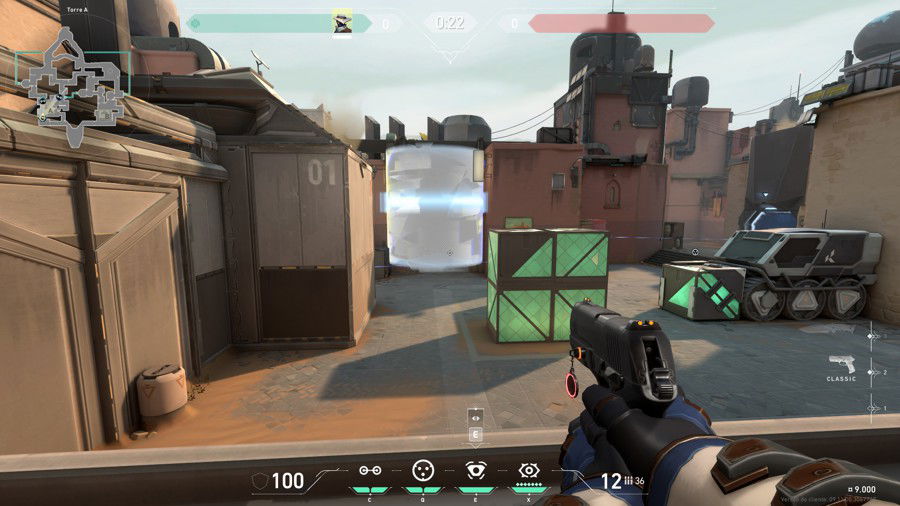
The last setup for this bomb brings the same idea of protecting each entrance a bit, with another great camera to get a wide view of the area. But now, we have added a one way to easily eliminate the enemies present in the bath.
Check out how to do it in the video below, pay attention to the smoke pixel:
Cypher setups on Bind's Bomb B
Setup 1
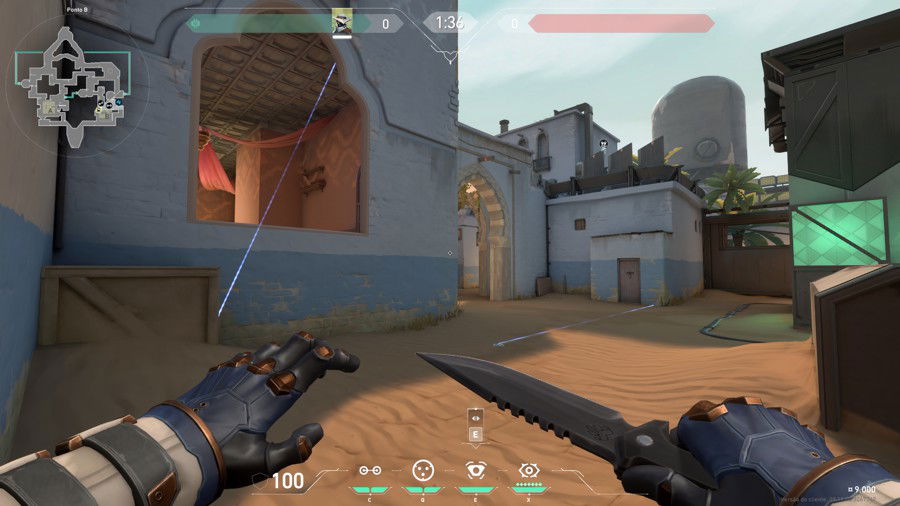
This first option is to prevent your team from appearing in B long to gather information, as your camera will do this instead.
The wires will have the role of slowing down the opponent's advance a little, as they are located right at the bomb entrances. Another positive point is that they are unconventional, which surprises the enemies.
Check out how to do it in the video below:
Remember to jump when installing the camera, if it’s a little lower, you will no longer have viewed of the long.
Setup 2
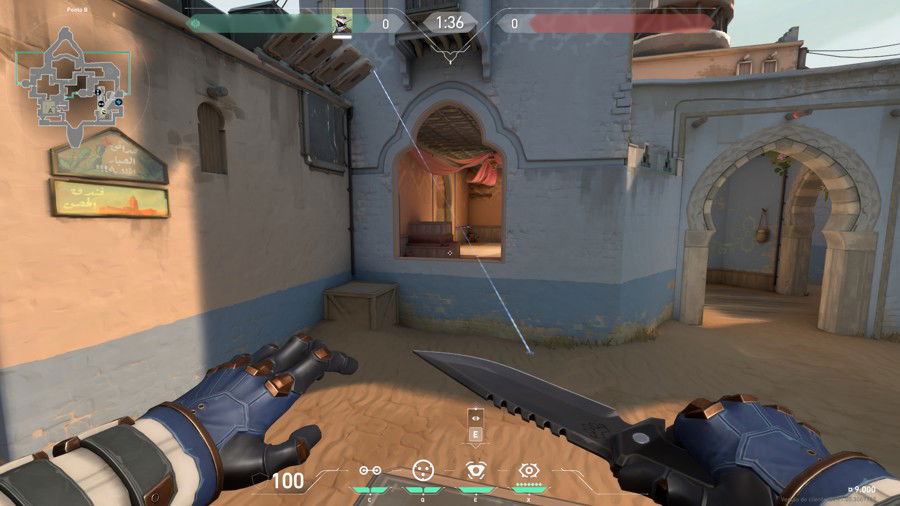
Here you have to focus your protection on the B Window, but you’ll need a companion to fight the enemies coming from the long.
We reversed the side of the wire that is at the entrance of the bomb via, to surprise our opponents again. There’s still another one further back, and difficult to remove, aiming to detect the presence of threats in Bomb B as soon as possible.
There is no fundamental camera on this occasion, I chose to use the same one as in the previous setup to provide at least a little support to the long.
Check out how to do it in the video below, and note how difficult it is for an opponent to destroy the back wire:
Setup 3
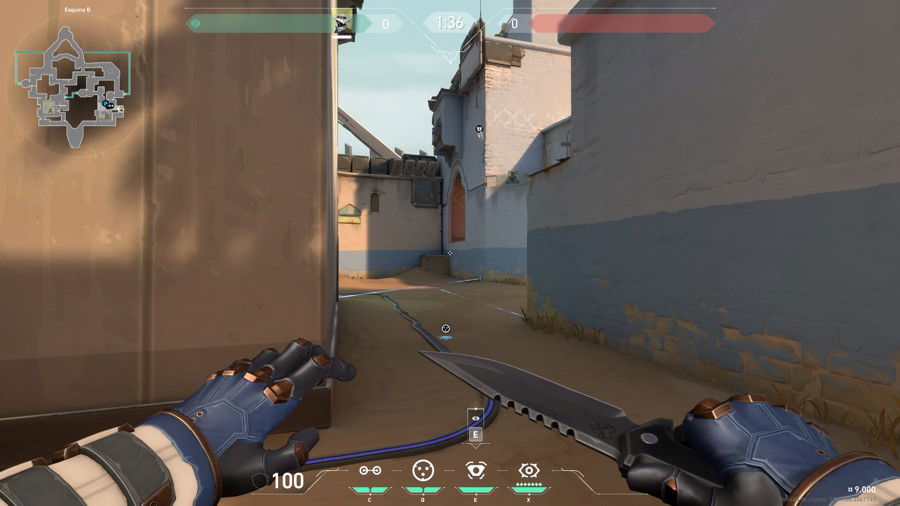
If the last one was focused on defending the B Window, now the focus is on the long. With two wires at that entrance, you must position yourself between the long and the hall and activate a smoke to protect yourself when you see the opponents. If one of them steps on the trap, you will have sight even behind the smoke, eliminating them safely.
The positioning of the camera is to detect the presence of advances coming from the window, as well as information about the enemy plant.
Check out to do it in the video below:
Setup 4
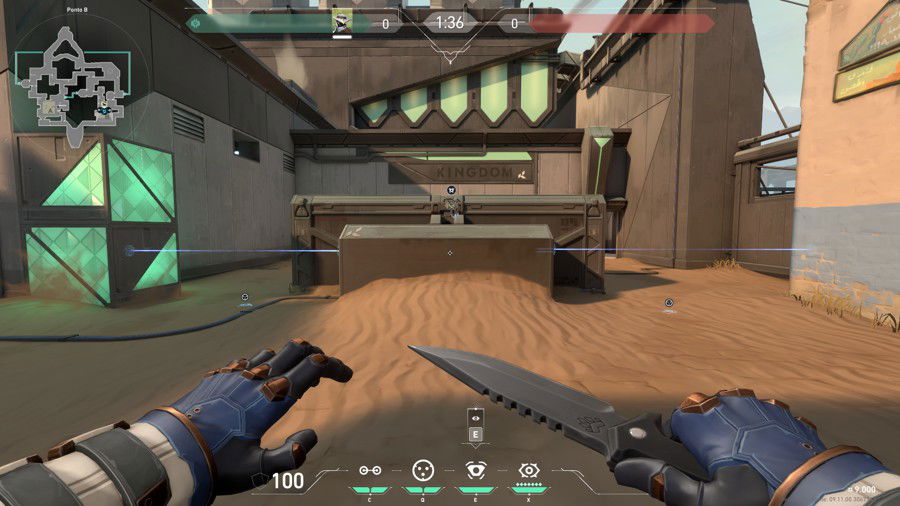
The simplest of all, but not necessarily the least effective. This setup is used when we want to stay very far back, letting enemies enter without difficulty.
However, there will be traps on both possible sides to plant the Spike, and the moment one of them is actually in the plant area, they will be seen, and you will be warned, when this happens, turn on the cage to impair his vision, and with the information provided by the wire you’ll have an easy elimination.
The camera inserted into the bomb itself is used to see how many opponents have already entered, since its wires will only catch those that are going to plant. In addition to detecting whether any adversary entered the hall from the long, which would be a certain threat.
Check out to do it in the video below:
Note that the place where I am is ideal for eliminating the enemy regardless of which side he goes to put the Spike on, and that the camera is really effective in observing whether there’s any advance in the hall.
One Ways
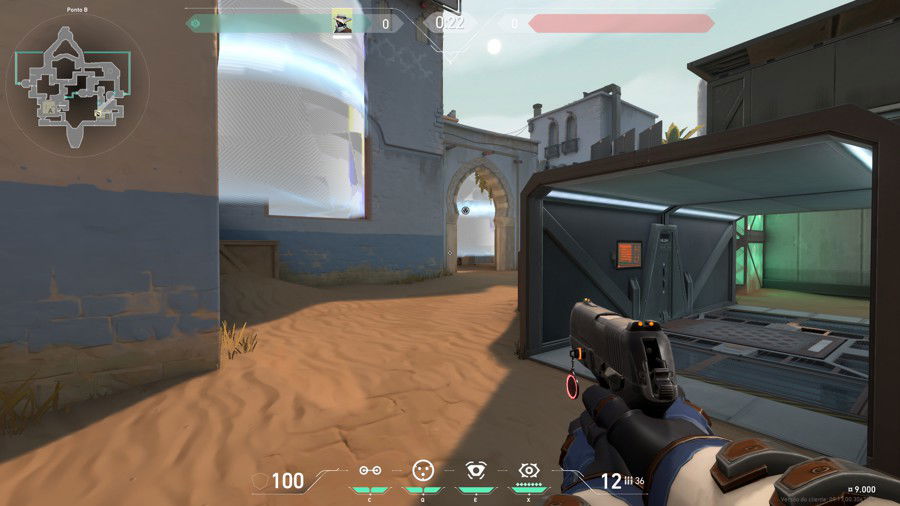
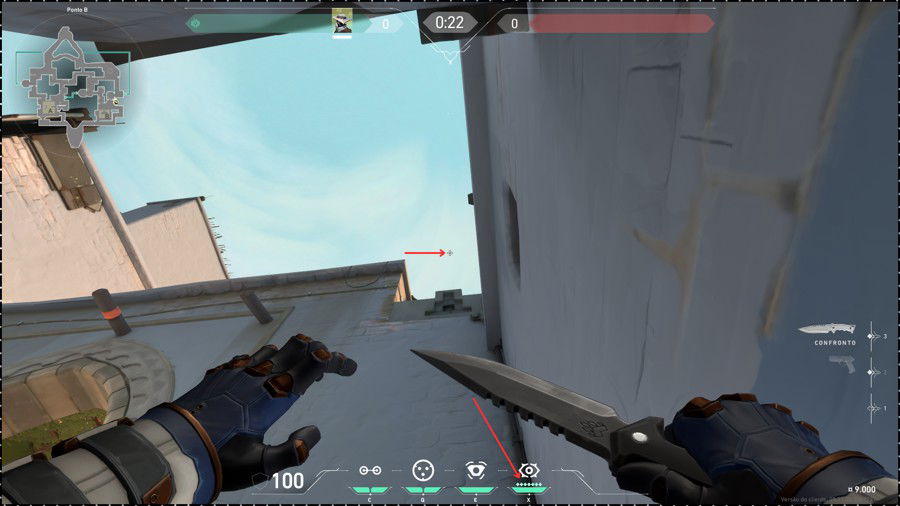
Although I didn't mention some pixels to make the Cyber Cage a one way in Bomb B, know that it’s possible to do it in B Window and in the long, we'll see it now.
The first one is slightly easier, while the long one requires some training until we understand the pixel masterfully. A tip for this is to align the second point of the Ultimate and the crosshair just a little above the corner of the roof, see it in the image below.
Attacking Side
Although Cypher's abilities are not known for their effectiveness in attack, we see some possibilities for smokes and cameras to help your team when playing on this side.
Bomb A
In this area, Cyber Cages will be fundamental at the entrance and post plant. A widely used strategy, especially in rounds where we are using a shotgun, is to use the two smokes on A shorts to facilitate entry. But, if you prefer, you can save them for after you dominate the region and plant the Spike, where it’s possible to make a one way against enemies coming from the defending base.
Bomb B
In the other Bomb, the most important thing is the positioning of the cameras to observe if there are any enemies marking the entrance where you will go with your team, whether in the long or the B Window.
Conclusion
Cypher is one of the most efficient sentinels in Bind, remember to change your setups to innovate, since after two or three repetitions your opponents will already know your strategy.
I hope this article helped you understand more about Cypher setups and one ways on Bind! I’m available for questions and suggestions in the comments.






— Comentários 0
, Reações 1
Seja o primeiro a comentar