Games

Game Guide

Final Fantasy XIV: A Starting Guide to Melee DPS

, Comment regular icon0 comments

Today, we present some highlights of the characteristics and concepts of FF XIV's Melee DPS, some tips on how to use them and what to expect from each job.

Writer image

translated by Meline Hoch

Writer image

revised by Romeu

Edit Article

So you're telling me you want to deal obscene amounts of damage while standing face to face with the enemy and watching their life flash before their eyes? Well, you've come to the right place! In this guide I intend to show you how the basics of the Melee DPS kit works in Final Fantasy XIV offering a small overview of what each one is capable of doing, as well as pointing out some key tips for you to do well with whichever you choose.

Melee DPS overall concepts and mechanics

Weaving and GCD use

Ad

  • One thing that Final Fantasy XIV does very well is giving you the false feeling that you're doing lots of damage, and then when you actually stop and analyze it, you dealt less damage than the healer. To prevent this from happening, it’s good to keep these two concepts in mind: Weaving and GCD.

  • Starting with “GCD”, it stands for Global Cooldown. In practice, whenever you as a melee DPS use a Weapon Skill, all others enter a short cooldown, usually something like 2 to 2.5 seconds. The big secret is to always keep this GCD running.

    Note that when using a skill from the combo I showed before, several skills also entered a short cooldown.
    Note that when using a skill from the combo I showed before, several skills also entered a short cooldown.

  • Now that you know about “GCD”, let’s talk about “Weaving”. As we’ve seen, not all skills enter this “GCD” cooldown time and that’s when we start using Off-Global Cooldowns or “oGCDs”, and in doing so, we do what is known as “Weaving ” - use a skill while on global cooldown to not lose damage.

  • As a rule and depending on your connection, it’s possible to use 2, and in specific cases, 3 skills within this cooldown time. Keep in mind that these skills generate a short animation lock on the character, preventing them from using another skill. Learning to use this effectively makes all the difference in your damage in the end.

    Positionals

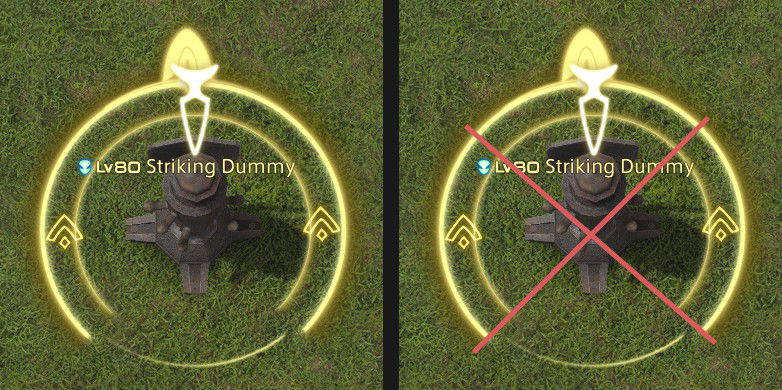
    Note the arrow pointing up. That’s the direction the enemy is looking, the flank areas are on the sides of the X, and below it is the rear area
    Note the arrow pointing up. That’s the direction the enemy is looking, the flank areas are on the sides of the X, and below it is the rear area

  • Some attacks from these jobs grant a bonus if the enemy is hit from a certain angle; Therefore, it’s important that you keep in mind which skill should go in each zone. It’s worth remembering that for the bonus of the zone to be applied, the character simply needs to be in the right place at the beginning of the animation. Once it starts, you can leave. Now, to see where each attack goes, just take a brief look at the skills by going to the Character > Actions and Traits menu.

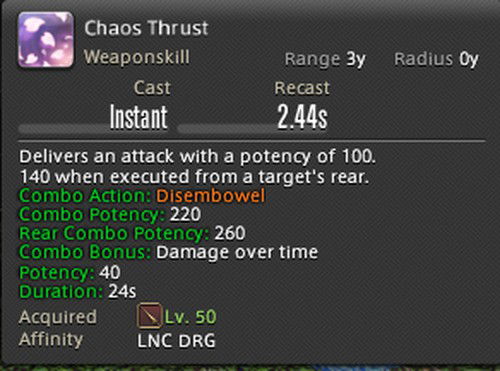
    Here we have an example of Dragoon's “Rear” skill, which deals an extra bonus when used on the enemy’s back
    Here we have an example of Dragoon's “Rear” skill, which deals an extra bonus when used on the enemy’s back

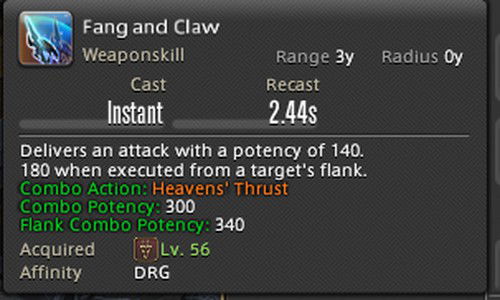
    And here we have a “Flank” skill, with a bonus if used on the sides
    And here we have a “Flank” skill, with a bonus if used on the sides

    True North and You

  • It’s important to mention that it’ll not always be possible to get the positioning right and come out alive. That’s why all Melee DPS have a “Role Action” called True North. It's a buff which allows you to ignore positioning requirements for a brief time, so it's good to have it on hand for these situations.

    Combo Actions

  • Melee DPS work with a “Combo Actions” system, which means that when using attacks in a certain order, they gain additional effects, such as offering buffs and extra damage.

    Ad

  • Since we already used Dragoon in the previous example, let's take a look at another one. For teaching purposes, we are a Ninja now. This job has an initial combo, with two possible finishers. Starting with Spinning Edge, when this attack connects to an enemy, this happens:

    Notice that there’s one skill highlighted with a dotted border. This means that some bonus is being applied to it
    Notice that there’s one skill highlighted with a dotted border. This means that some bonus is being applied to it

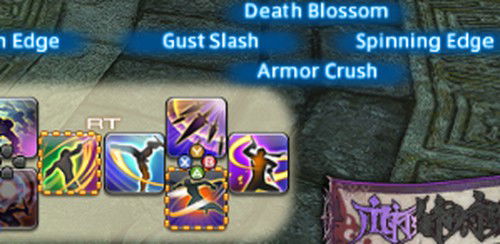
  • Following along, let's use Gust Slash, which is the name of the skill highlighted there:

    Now, the 2 combo finishers are evidenced
    Now, the 2 combo finishers are evidenced

  • What defines which one will be used is the situation in which you find yourself. In this case, the “Armor Crush” finisher gives you 2 stacks that increase the damage of “Aeolian Edge”. In other words, if you have stacks, use “Aeolian Edge”, if you don't have it, “Armor Crush”.

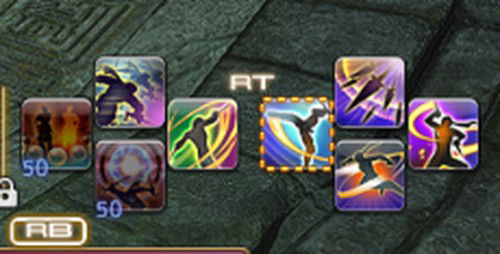
  • It’s worth mentioning that what’s highlighted is not always necessarily something with a “Combo Action” bonus. There are also many cases where when you accumulate a certain amount of a resource, a skill will be highlighted, indicating that it’s ready for use.

    It's important to mention this, as the Samurai has two skills that basically turn your bar into a Christmas tree
    It's important to mention this, as the Samurai has two skills that basically turn your bar into a Christmas tree

    Positionals

  • As a rule, a Melee DPS should stay directly behind the bosses, go to the sides, get the juicy flank bonus and go back. Avoid being close to the main Tanker as much as possible, since it’s common for bosses to have area attacks aimed at them. They can take a beating, can you? Not so much.

  • There are bosses who are gigantic and occupy an entire side of the arena. These specific bosses do not have “Positionals”, so the bonus will be applied regardless of where it’s hit.

    Role Actions

  • All jobs in the game share some skills with other jobs of the same category, for example, all 4 tankers have a skill set in common. These fall within the “Role Actions” category, and for Melee DPS we have:

    Feint

  • It’s a debuff against an enemy, which mechanically causes it to deal less physical damage and a little less magical damage. It's very useful for reducing the damage of attacks like Raid Wides! (attacks that cannot be dodged). Keep in mind that this debuff does not stack with another Melee DPS’s, so if someone else uses their Feint alongside yours, it will just override the effect.

    Bloodbath and Second Wind

  • Bloodbath and Second Wind, in essence, both have the same function: to prevent you from being dismissed from the world of the living. Second Wind offers a humble heal at lower levels, but it can make the difference between you surviving a raid wide or not. At around level 94, Second Wind gets an upgrade, which gives a more consistent heal, which on a critical hit, can heal up to about 40% of your total HP, given the right circumstances.

    Ad

  • Bloodbath gives you a buff that causes a portion of the damage you deal to be converted into HP. Unlike Second Wind, Bloodbath relies solely on you to heal, in the sense that if you have a heavy attack to use, you will heal more than if you don't.

    Arm’s Length

  • Commonly used by Tankers as mitigation in “Big Pulls” (I did complete coverage of how to tank here on the site already!), this skill can also be used by Melee DPS to avoid pushbacks and stay close to the boss. Here, I'll explain better.

  • Arm’s Length has 2 functions: when hit by an enemy, it slows them down, making their auto-attacks slower. Also, while it’s activated, you cannot be pushed back by most attacks. Focus on the “most” part.

  • How do you know if knockback immunity works or not? Well… trial and error. One situation in which it doesn't work at the beginning of the game is the Titan's charged punches, right at the level 30 Trial. As you progress through the game, you'll discover where you can and can't use them, and where it's actually worth using them. There are cases where to apply a mechanic, you need to be pushed and if you aren't... you take home a vulnerability.

    Leg Sweep

  • It’s a simple stun, lasting three seconds, which can be inflicted on common enemies. After a certain level, bosses become completely immune to this skill, making its use very niche.

    Which is the best DPS for you

  • Before we begin, it’s worth remembering that all Melee DPS are capable of fulfilling all content in the game, without having a large discrepancy in their capabilities to the point that X job is excluded from groups because it’s not viable. Therefore, always remember to use the one that best suits what you like to do.

    Lancer/Dragoon - Free trial - Starting Job
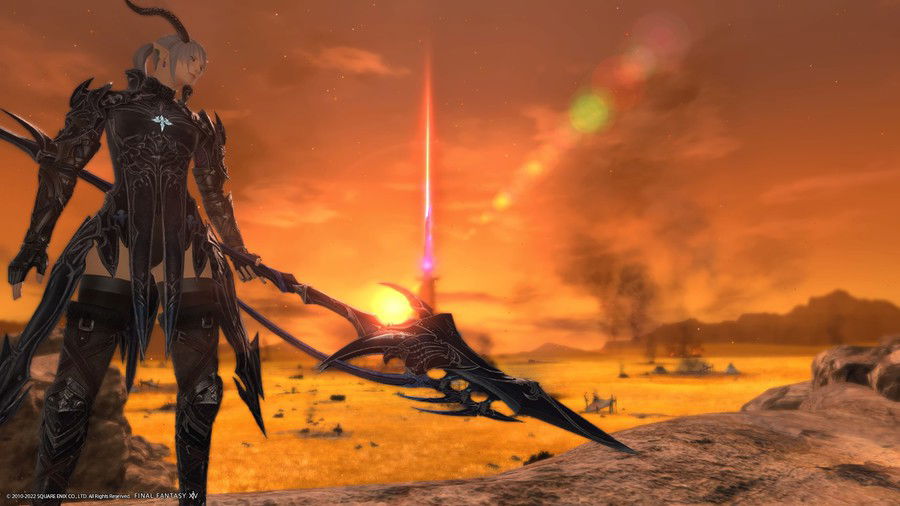
    Rare sight of someone playing as Elezen
    Rare sight of someone playing as Elezen

  • Starting as a Lancer in Gridania, this job works with two distinct lines of Combo Actions, one focused on causing bleeding damage to the target and giving a damage buff to the Dragoon, and the other focusing simply on dealing damage. These two sequences are already part of the kit from level 50 onwards, in addition to some “Jumps”.

  • “Jumps” are the most characteristic Dragoon “oGCDs”, and believe me, you have a lot of them, such as “Jump”, “Dragonfire Dive”, “Stardiver” and so on. When using them, your character will advance towards the target, generating an instant of animation freeze, so be careful.

  • Starting at level 56, the first extender to Dragoon's basic combo comes, in the form of “Fang and Claw”, the second comes at level 58 as “Wheeling Thrust” and then the combo is complete at level 64, with the “Drakesbane”. This makes Dragoon have a unique 5-hit sequence, while most stick to 3-step combos.

  • Talking a little more about the job’s “oGCDs”, at level 70 it gets an upgrade to “Geirskoul”, which when used after 2 “Mirage Dive”, generates a state of fury dealing 15% damage over the next 20 seconds and along with that, a new “oGCD” to crush whoever is out there.

    Ad

  • Regarding utilities now, Dragoon has a lot of mobility, in the form of the “Elusive Jump” along with the “Winged Glide”. Elusive Jump makes you do a backflip and move back a few meters, giving you a lot of flexibility on how to use it, for example, turning the character back quickly and then using Elusive Jump, makes it serve as a sort of advancement. Winged Glide is a little simpler, where you just move towards a target, however, as it doesn't deal damage, it's not part of the basic rotation, so it should almost always be available for use!

  • And if you like giving buffs to your team, Dragoon won't abandon you. Battle Litany increases your and your team's critical chance by 10% for 20 seconds!

    Monk/Pugilist - Free Trial - Starting Job
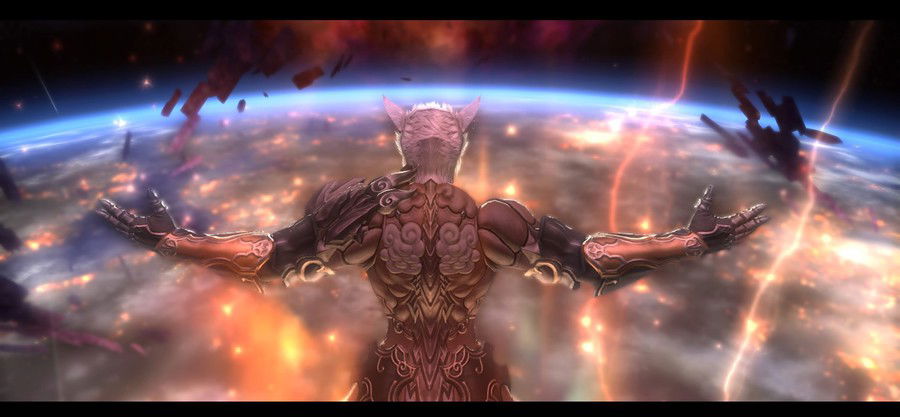
    Yes, I like Asura's Wrath, how did you guess?
    Yes, I like Asura's Wrath, how did you guess?

  • So, punching and kicking someone into a pulp is something that fascinates you? Well, Monk requires a bit at the beginning for you to understand how its Combo Actions work, which are a bit different from the standard of other DPS.

  • Instead of fixed combo lines, the Monk works with stances, and each stance offers a benefit for a selection of skills and when using one of them, he automatically switches stances. Seems complicated, right? This is one of the cases that’s easier to understand in practice than in theory, let's take a case here:

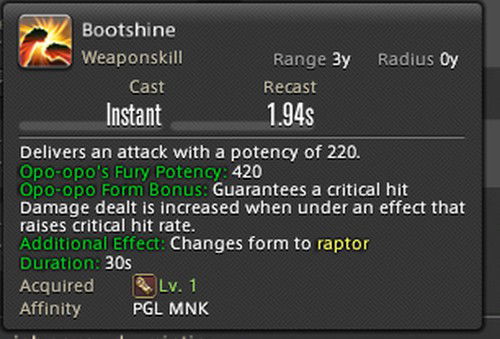
    This is your first skill
    This is your first skill

  • Note that it doesn’t have a “Combo Action Bonus” but rather a stance-related bonus. Then, when you use it, you switch to “Raptor Form” and this one gives bonuses to 3 other attacks, 1 of them being an area attack. The game itself also helps you with this, as whenever one of the skills has a stance bonus, it will be highlighted, as if it were a Combo Action like we saw before.

    Notice that all 3 of these have a bonus for “Raptors Form” and then give you a new stance
    Notice that all 3 of these have a bonus for “Raptors Form” and then give you a new stance

  • With this concept in mind, the Monk rotates between 3 stances, which simulate the “Combo 123” of other DPS. Among these GCDs, Monk has a Chakra system, gaining a charge every time they land a critical hit, and when accumulating 5 of these, an oGCD is released and can be used, consuming these charges.

  • At level 60, the job undergoes a drastic change with the implementation of “Masteful Blitz”. Now, whenever you use Perfect Balance and three attacks, a new marker will be loaded, the Nadi: a Solar Nadi will be generated when you use attacks from 3 different stances (Bootshine > Twin Snakes > Demolish, for example, form a sequence) and execute the finisher. A Lunar Nadi will be created by repeating stances (Dragon Kick > Bootshine > Dragon Kick) and, again, closing with a new finishing attack.

  • Now that you have these two Nadi charges triggered and perform Perfect Balance again, you will notice that a new finisher, even stronger than the others, will appear and consume said charges. It's worth mentioning that at level 90, this finisher is very similar to Tifa's “Omnistrike” from FFVII Remake!

    Ad

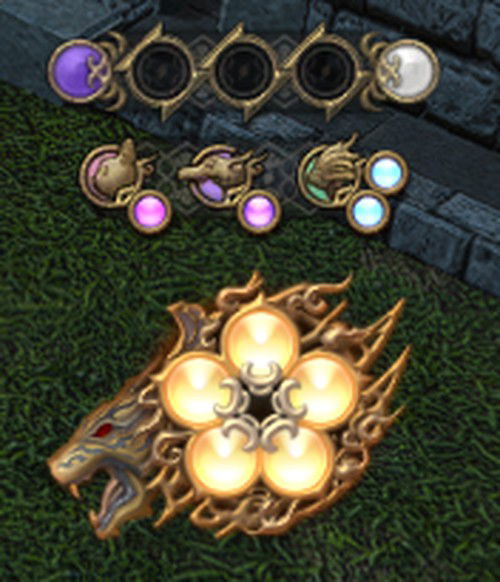
    Top: Lunar and Solar Nadi charged. In the middle: the “Fury” bonuses that each stance generates. Below: 5 Chakras charged and ready to be released
    Top: Lunar and Solar Nadi charged. In the middle: the “Fury” bonuses that each stance generates. Below: 5 Chakras charged and ready to be released

  • Now let's move on to what it offers the team. Just like Dragoon, it has a party buff in the form of “Brotherhood”, which gives 5% more damage to everyone in the party, means you can accumulate up to 10 Chakras instead of 5 and whoever has your buff has a 20% chance of giving you a Chakra every time you use a GCD. You basically become a slap gun during this buff window.

  • In addition, it has “Mantra”, which increases the team's healing by 10%, and that can help a lot to recover HP after a heavier raid wide. It also has a niche use when using it right before Second Wind to give it a boost.

    Rogue/Ninja - Free trial - LV 10

  • If you enjoy a very active DPS, where you press several buttons, and it feels like you drank three liters of energy drink, Ninja is for you.

  • The Ninja's basic kit is divided between an 123 Combo with two possible finishers, which I mentioned previously in the overall mechanics, and a unique Jutsu system. Yes, jutsu.

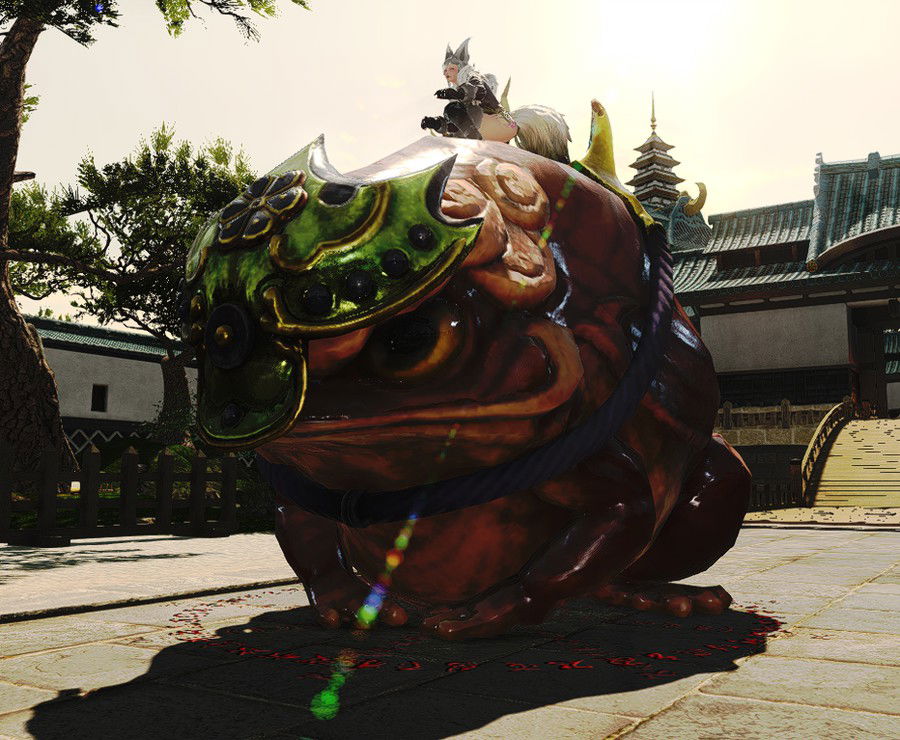
    You can even summon frogs!
    You can even summon frogs!

  • Let's get to it. The jutsu system works through three hand signals. Depending on the combination and quantity used, you have a total of seven jutsus at your disposal, varying between area or single-target attacks, jutsus that allow you to apply a unique debuff to enemies, and even a very niched one that roots the target, preventing them from walking.

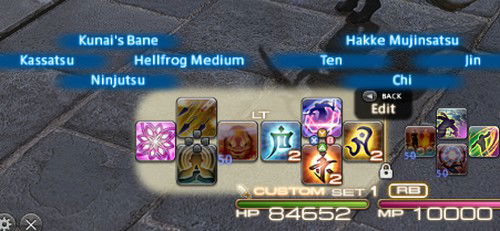
    To perform the jutsus, we combine the hand signs “Ten”, “Chi” and “Jin”, and we release the result in Ninjutsu
    To perform the jutsus, we combine the hand signs “Ten”, “Chi” and “Jin”, and we release the result in Ninjutsu

  • One tip I give for using jutsus is to create muscle memory for them. For example, I'm an old-school guy who played good old Street Fighter. Note that to press Ten and Chi, I do a “round-kick” and then press “Ninjutsu”. Hence, I always know “Round Kick Forward” will be a single target jutsu. And look, if I press Chi and Ten, it forms a “round-kick backwards”, and the area attack jutsu comes out.

  • I use this methodology for all jutsus and this is my suggestion for those who play on controller, but it’s not something to follow to a T exactly. If you have an even better method, comment below!

  • About utilities, the Ninja offers a debuff on the enemy through the “Mug” skill that causes them to take 5% more damage from all sources. It also has a unique form of movement called “Shukuchi”, which allows it to instantly go to a place you point to, without depending on the target or direction your character is facing.

    Samurai - Free trial - LV 50

    I wanna see who gets the reference
    I wanna see who gets the reference

  • Now that we've seen more than half of the DPS, some similarities will start to show up. Remember Monk’s “Perfect Balance” system? Samurai has a similar version, however, instead of depending on a buff to get his Nadis, Samurai works with Seals, and having three sequences of “Combo Actions”, he generates these seals from them.

    Ad

    “Gyofu” is an upgrade of “Hakaze”, his level 1 skill
    “Gyofu” is an upgrade of “Hakaze”, his level 1 skill

  • Now that you've seen the combos, let's deal with the Seals. Each combo generates a unique type of Seal, and having a certain amount of Seals releases finishers in the “Iaijutsu” skill. One Seal gives you an attack that causes a bleeding effect for one minute, two seals is a strong area attack and with three Seals is a single target attack with a lot of guaranteed critical potency.

  • The big trick to playing Samurai is knowing how to rotate between combos fluidly, keeping the bleeding always active and unloading as many 3-seal finishers as you can.

  • In addition, Samurai has a gauge which goes up as you hit your enemies and generates charges to use in your “oGCDs” to be used between your GCDs

  • Regarding utilities for the team, it doesn't have any. Samurai is known as a “Pure DPS”, which is a job that has no buffs for the team, only for themselves. Speaking of which, Third Eye is a defensive that can even increase your damage if used correctly. When you fulfill its condition, which is to be hit by some damage within 3 seconds, you gain a charge for your oGCDs, and at higher levels, this skill even offers a cure! But please don't stay on top of attacks on purpose for it, the idea is to use this on damage you would take anyway, like a Raid Wide.

    Reaper - Endwalker - LV 70

    It's very easy to look like a super villain with this job
    It's very easy to look like a super villain with this job

  • We've reached the most showcased Melee DPS in the game, but we're going slow here. Despite having many effects and brightness on the screen, Reaper is one of the simplest jobs in Final Fantasy XIV. Don't believe me? It only has one sequence of “Combo Actions”, its main offensive oGCDs (“Blood Stalk” and its variations) depend on charging to be used and release a GCD that needs to be used immediately after the oGCD, otherwise its use is lost.

  • And that was half the Job, now let's move on to your transformed form, in which you... do almost the same thing, only now you have 5 charges to use in 2 more powerful and faster attacks. At higher levels, using these charges grants you use of a unique oGCD to be used while transformed and has a finisher, which is ideally used in the last charge, Communio. It’s worth mentioning that these stronger attacks have a variation to be used against multiple targets.

  • As edgy as Reaper is, it has some pretty cool uses for the party. The main one comes in the form of the Arcane Circle, increasing the entire team's damage by 3%, and whenever an ally uses a GCD, the Reaper who gave the buff gains 1 stack, which can accumulate up to 8. These stacks are used to unload a very powerful attack, and using this attack allows you to transform without spending resources and even gives you a second finisher after Communio, at level 100.

  • Reaper also has “Hell's Ingress” and “Hell's Regress” at their disposal, which are an attack and a retreat, respectively. The unique feature of these movements skills is that they leave a portal behind, which the Reaper can use to return to their original starting position, giving a lot of flexibility to how it’s used.

    Ad

  • They also have a defensive skill called “Arcane Crest”. It offers a small shield for 5 seconds, however, at higher levels, if the shield is broken, Reaper and their allies gain a small HP regeneration effect.

    Viper - Dawntrail - LV 80

    The newcomer among the Melee DPS
    The newcomer among the Melee DPS

  • This isn't the first time I've discussed the Viper here on the site, we actually have a very complete guide to it here, so I'll be brief. Viper is the most active job in the game, when I say active, I mean commands made/buttons pressed per minute, averaging 50 per minute at level 100!

  • If you're looking for a job that constantly mixes and uses fast, non-stop attacks, Viper is your best choice, working as follows. It only has two initial combo sequences; however, these will transform as you progress, for example: when using the Steel Fangs skill, this same button will transform into the next skill in the combo and so on. Additionally, like Reaper, it has a transformed form with more powerful and faster attacks.

  • For specifics on the best way to use each one, take a look at hyperlink{our guide here}.

  • And about utility… Viper is like the Samurai, being a “Pure DPS”. The best it can offer outside “increasing your own damage” is having three uses of “Slither”, which is a charge forward that can be directed at enemies or allies.

    Conclusion

    After all this barrage of information, I hope you have a good idea of ​​what to expect from each job, but I must remind you that what I wrote here is just a summary of what each one does, to decide which one to take at the beginning, or even which one to level going forward.

    See you in the next article, where we'll talk about DPS Casters!