Released at the end of June, Corrode is Valorant's newest scenario. With this in mind, many Cypher fans still don't know the best strategies for deploying their wires and traps. Because it's active in the map rotation, it can be played in both casual and competitive modes, so be prepared to use Cypher, knowing all the setups to improve your defense.
This article is also important for players of other agents who are playing against a Cypher, as it's always crucial to understand the potential pitfalls you might encounter.
With this in mind, we at UmGamer have created a comprehensive guide to show the setups and one-way tactics used by the best Cypher players to defend Corrode. Check it out!
Cypher Setups at Corrode’s Bomb A
Setup 1
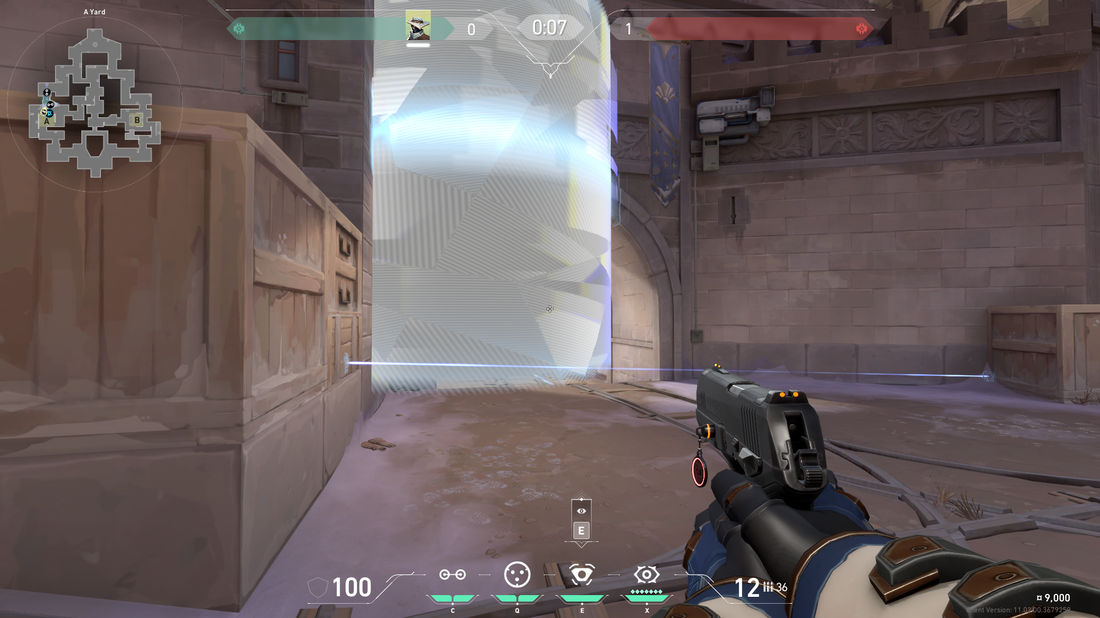
The first setup focuses entirely on the main entrance to bomb A. You'll use the two tripwires to make it difficult to advance quickly in that area—the second can only be placed after the round starts. The camera will also help you gain better control of the area.
The difference is that it's one-way, allowing you to get the first kills. Make sure to align your aim between that line and the dark part of the wall, as I do in the video below.
The furthest back wire is for when your first traps have already been activated. You'll retreat behind the box, and since shots from weapons like Vandal can hit this, you'll be able to pick off those who land there.
The biggest weakness of this setup is that it doesn't protect any connection between the middle and bomb A—enemies can advance through this area and not only kill you easily but also plant the bomb without any difficulty. Therefore, I recommend having another player provide cover, and good communication with whoever is in the middle surely is necessary.
Setup 2
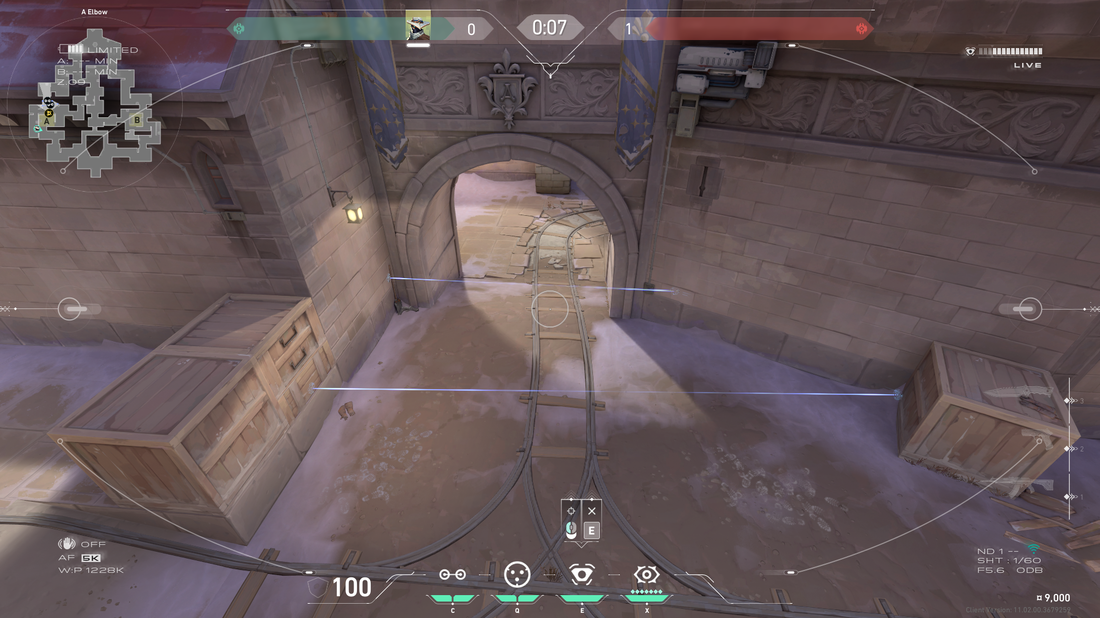
Much like the previous one, this one is also designed exclusively to defend the main entrance to A—so remember to call a second player to defend the area connecting the middle with your bomb.
The biggest difference here is that you'll play from further back, literally from inside the bomb. Corrode is a map where shots can pass through many walls, so let's take advantage of that. With the camera and wires, you'll have information about your opponents' presence, and then just shoot.
With a weapon with a large ammunition load, like the Odin, you'll be able to deal extreme damage without even being seen by your opponents. The video below doesn't illustrate this, but you can place one or two cages next to the traps to further confuse your opponents.
Setup 3
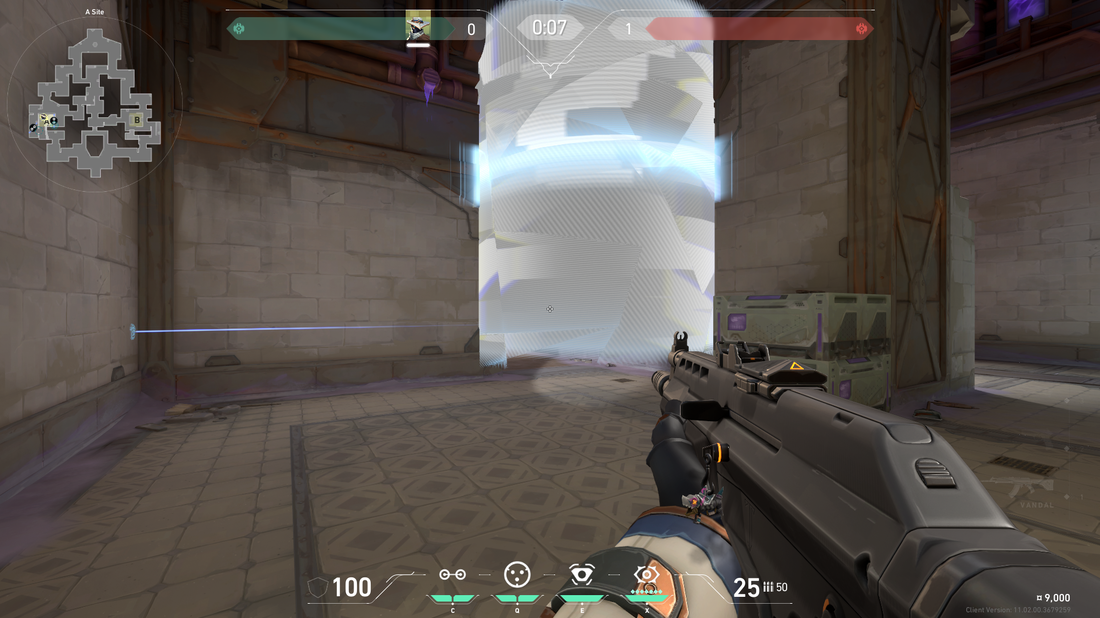
This is an option when you're alone or your ally doesn't want to take risks. The idea is to let go of the initial area and protect only the doors that actually provide space for the enemy plant.
There's a great one-way approach in this situation. You'll see it in practice, but it's worth mentioning in writing as well: position yourself on the second brick line in the wall and aim for the second screw—counting from top to bottom—on the structure.
A tip: Try to stay close to the central bomb box; it will help you defend yourself from a potential backshot.
Other than that, it's a simple setup to get done and doesn't even require a specific camera.
‘Cypher Setups at Corrode’s Bomb B
Setup 1
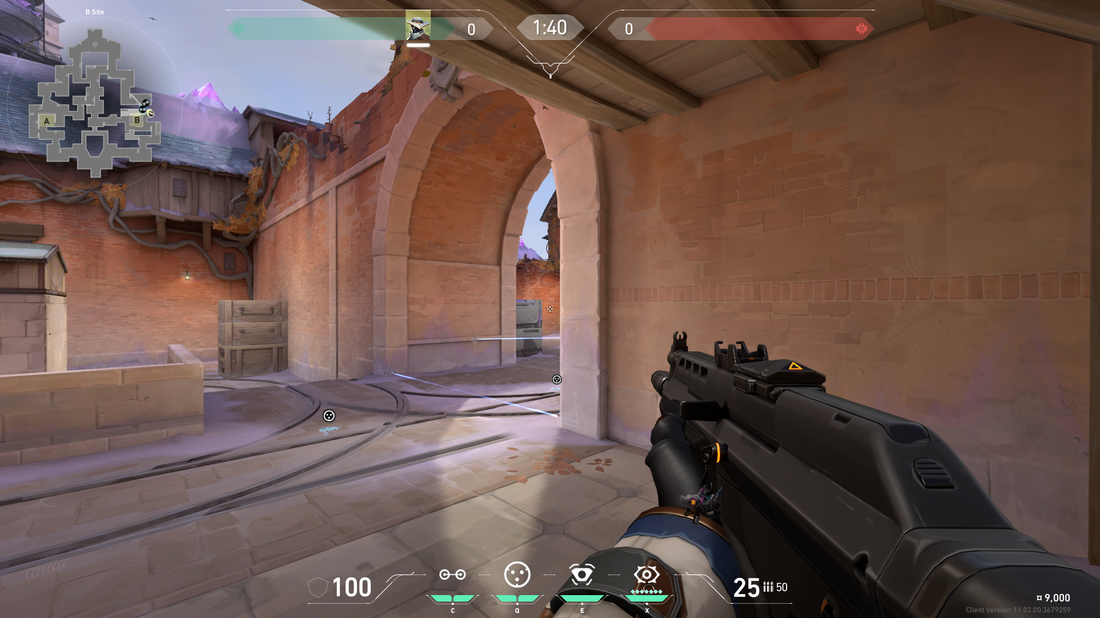
Like the first setup on A, this one is designed to only inhibit the opponent's execution through the main entrance. Since the connection between B and mid is much closer to the defending base than the attackers', you can ignore it initially.
In this strategy, you'll play very advanced and attempt a first kill solely with gunfire. After being spotted, regardless of whether you've scored a kill or not, activate one of the cages—this will simulate a retreat on your part.
When the opponents try to advance, they'll encounter your first wire. Take advantage of this to get a kill and immediately activate the next smoke. They won't expect a second wire in the same area and will likely activate it as well—guaranteeing another kill for your team.
Setup 2
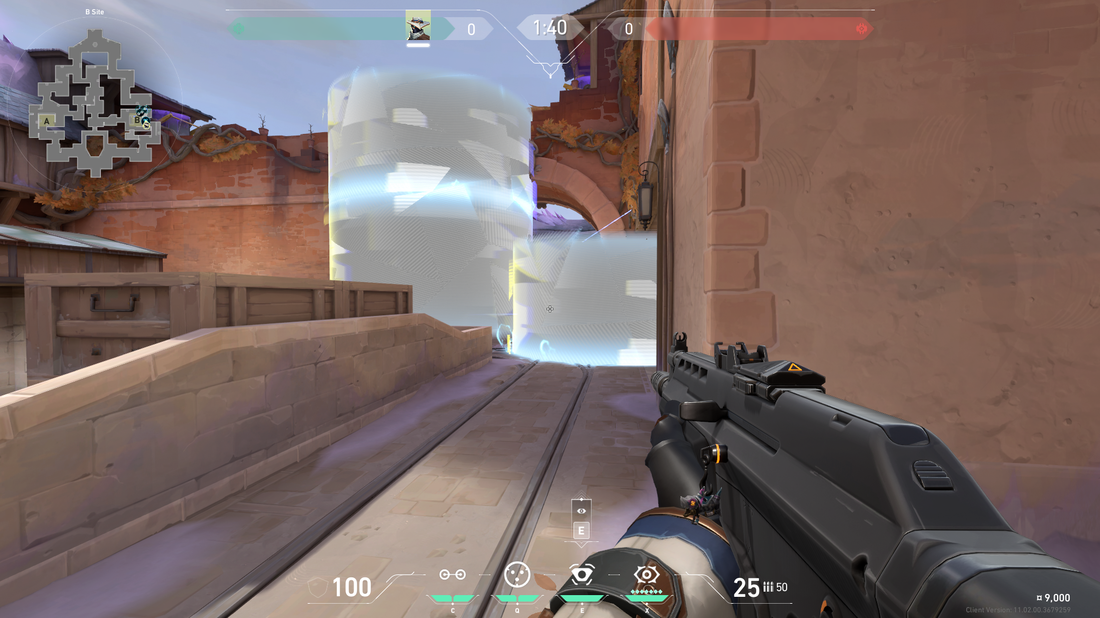
One of the strongest positions when dealing with Corrode's B area. With the camera positioned at the castle sky, you'll have a wide view of both possible enemy entrances. However, your focus will still be the main one.
You'll play more defensively, and since the B gate is large, you'll use a combination of two cages to get the first kill. The one on the left is a one-way option to give you an advantage in the trade, but since it doesn't cover the entire area, we use the one on the right as protection.
Finally, the opponents will still need to destroy two complex and surprising wires—if one of them falls into the trap, another kill is almost guaranteed.
Setup 3
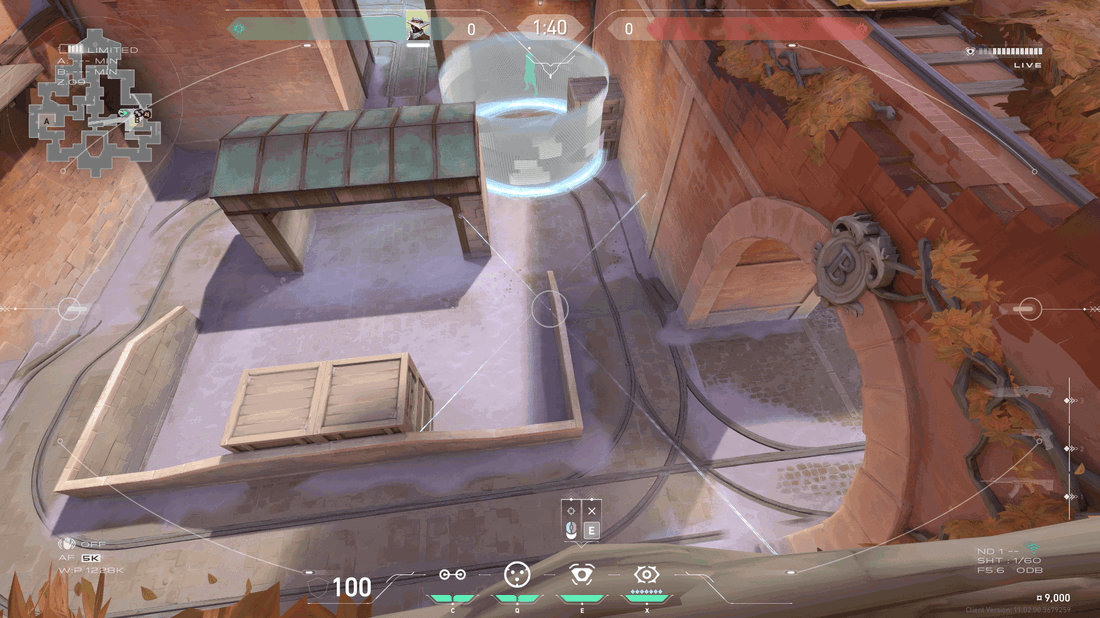
Finally, B's last setup can be useful when you're not with other allies. Another camera dropped from the sky is used again to gain a great view of the bomb and its openings.
The wires still prioritize targeting those entering through the main gate, but your positioning and the more defensive smokes give you greater freedom to move around the area without fear of being shot from the surrounding area.
It's a simple strategy.
Conclusion
Cypher remains very useful for defense; nothing has changed with the release of Corrode. I hope you enjoyed this article; feel free to leave any questions or suggestions in the comments.






— Kommentare 0
, Reaktionen 1
Sei der erste der kommentiert