Final Fantasy

guía de juego

Final Fantasy XIV: Guide for Caster DPS

, Comment regular icon0 comments

Check out this guide for everything you need to know to get an idea of ​​how each of Final Fantasy XIV's Casters work and how to play with them!

Writer image

traducido por Meline Hoch

Writer image

revisado por Romeu

Edit Article

Índice

  1. > General concepts and Caster mechanics
    1. Slidecast
    2. Swiftcast and You
    3. Positioning
    4. Weaving and use of GCD
    5. Role Actions
  2. > Which is the best Caster for you?
    1. Arcanist/Summoner - Free trial - Inicial
    2. Thaumaturge/Black Mage - Free Trial - Initial
    3. Red Mage - Free trial - LV 50
    4. Pictomancer - Dawntrail - LVL 80
  3. > Conclusion

So, you're telling me you want to rain fire upon your enemies and master the ancient art of standing still, channeling magic from the comfort of your chair? Well, you've come to the right place! In this guide, we show you how the basics of the Final Fantasy XIV Casters kit works, offering a small overview of what each one is capable of doing, as well as pointing out some key tips for you to do well with whichever you choose.

General concepts and Caster mechanics

Slidecast

The main disadvantage of this function is that many of its attacks have a channeling time, meaning you have to stay still to hit. However, there is a scheme that can be done to alleviate this, the “Slidecast”.
Ad

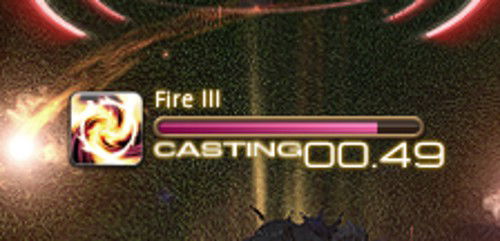
Example of a channeling bar, aka “cast”

  • Depending on your internet connection, you may start moving before the bar is complete, and the spell is performed anyway. As a rule, I start moving when there’s 0.5 seconds left, but remember that this is just a guide! Practice trying to walk before your casts end to find out when you can walk.

    Swiftcast and You

  • It’s important to mention that it won’t always be possible to channel magic to maintain constant damage and come out alive. To do this, all Casters have a “Role Action” called “Swiftcast”. It's a buff that allows you to ignore the channeling time of a spell, making its “cast” instantaneous.

    Positioning

  • As a rule, a Caster should stay directly behind the bosses, or close to where the healers and the rest of the team are. Avoid being close to the main Tanker as much as possible, as it’s common for bosses to have area attacks aimed at them. They can take a beating, but you, wearing only a few pieces of cloth? Not so much.

    Weaving and use of GCD

  • One thing that Final Fantasy XIV does very well is giving you the false feeling that you're killing it in damage, and then, when you stop and analyze it, you realize that you did less damage than the healer. To prevent this from happening, it’s good to keep these two concepts in mind: Weaving and GCD.

  • Starting with “GCD”, it stands for Global Cooldown. In practice, whenever you use a Weaponskill or Spell, all others go on a short cooldown, usually something like 2 to 2.5 seconds. The big secret is to always keep this “GCD” running.

    Note that when using a skill, several skills also went on cooldown
    Note that when using a skill, several skills also went on cooldown

  • Now that you know about “GCD”, let's talk about Weaving. As seen, not all skills fall into this “GCD” cooldown and that’s when we use Off-Global Cooldowns or “oGCDs”, and in doing so, we do what is known as Weaving - using a skill in the middle of a global cooldown so as not to lose damage.

  • As a rule and depending on your connection, it’s possible to use two skills within this cooldown time window. Keep in mind that these skills generate a short animation lock on the character, preventing them from using another skill. Learning to use this effectively makes a difference in your damage in the end.

    Role Actions

    All jobs in the game share some skills with other jobs of the same category, for example, all tankers have a set of skills in common. These fall within the “Role Actions” category, and for Casters we have:

    Addle

  • It's a debuff that you cast on an enemy, which mechanically causes them to deal less magical damage and a little less physical damage. It's very useful for reducing the damage of attacks like Raid Wides! (attacks that cannot be dodged). Keep in mind that this debuff does not stack with another Caster, so if someone else uses Addle alongside yours, it will only overlap the effect.

    Ad

    Lucid Dreaming

  • Lucid Dreaming is a buff which can be used to replenish your MP, generating around 500 MP every 2.5 seconds for 21 seconds. Typically, Casters don't have much need to use this, but it’s good to use occasionally in longer fights.

  • It's worth remembering that if you are defeated, your MP will drop to zero, and a mage without mana doesn't do much. Then, as soon as you are revived by the healer, wait to be healed, and then use Lucid Dreaming to return to combat.

    Surecast

  • It works almost like the Tankers' Arm's Length. The main difference is that, instead of causing “Slow” on enemies that hit you, it means that your channels cannot be interrupted by damage.

  • However, the main use of Surecast is to avoid being pushed back by most attacks that might interrupt your cast. Focus on the majority part.

  • How do you know if knockback immunity works or not? Well… trial and error. One situation in which it doesn't work at the beginning of the game is the Titan's charged punches, right at the level 30 Trial. As you progress through the game, you'll discover where you can and can't use them, and where it's actually worth using them. There are cases where, to perform a mechanic, you need to be pushed and, if you're not... you take home a vulnerability.

    Sleep

  • As the name suggests, it puts the target and anyone nearby to sleep for 30 seconds. It sounds like a very good skill. However, the enemy wakes up and returns to combat as soon as it takes any damage, which makes its use extremely niche, as it requires good team coordination to extract any benefit from the magic.

  • In a more desperate situation, you can put a DoT (Damage over Time) effect and put the target to sleep. Damage from this type of effect does not awaken the target.

    Which is the best Caster for you?

    Before we begin, it’s worth remembering that all Casters are capable of fulfilling all content in the game, without having a large discrepancy in their capabilities to the point that X job is excluded from groups because it’s not viable. So, always remember to use the one that best suits what you like to do.

    Arcanist/Summoner - Free trial - Inicial
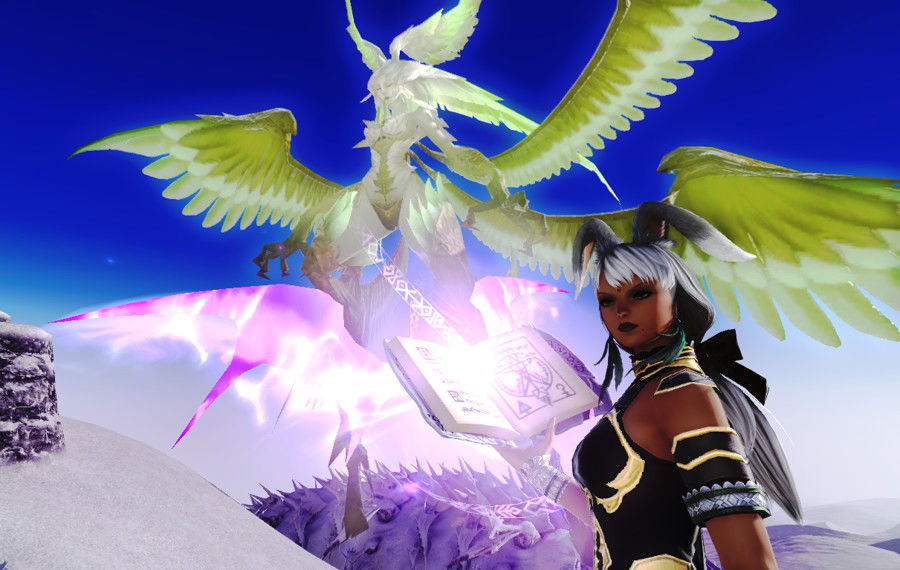
    I have a book that shines, and I'm not afraid to use it. Oh, and there's that summon there too, but that’s just a detail
    I have a book that shines, and I'm not afraid to use it. Oh, and there's that summon there too, but that’s just a detail

  • Starting as an Arcanist in Limsa Lominsa, this job works mainly with summons, in which the player's attacks change as he changes the summoned pet. At first, only the standard Carbuncle is available, and he doesn't do much other than frown while you get beat up by monsters.

  • As the levels increase, around level 22, the job’s main mechanic of alternating invocations becomes more evident. You use “Aethercharge” to improve your base attack which is “Ruin” for a while, and when the effect ends, you can summon your three summons and each of them will transform your “Gemshine” and “Precious Brilliance” into elemental variations.

    Ad

  • The Summoner has two types of summons: common summons in which the monster is summoned, hits a single attack and then leaves, and there are Demi-summons, in which whatever is summoned stays in the arena for a period of time running auto-attacks and whatever you tell it to do, varying with the type of what is called. Detail: when a Demi summon is activated, you cannot call others and vice versa.

    Common - Ifrit

  • Ifrit makes attacks slower but stronger. At higher levels, you even get a charge and a book melee strike. Nobody expects an enemy with a book to use it to beat you up, right?

    Common - Garuda

  • Garuda is the opposite of Ifrit, meaning your strikes are very fast, offering good mobility to escape area mechanics and attacks. In addition to that, at higher levels, you also have an attack that causes a damage zone wherever it hits the target enemy. It's a good idea to use Swiftcast in this attack, as its channeling time is high by Summoner standards.

    Common - Titan

  • Titan is the middle ground. His attacks are faster than Ifrit's, but not as fast as Garuda's, and they don't hit as much as Ifrit's. What makes him more unique is that, at higher levels, when using one of his attacks, an “oGCD” is enabled for immediate use after each attack, making this phase of the rotation very active.

    Demi - Bahamut

  • This will be your first Demi-type summon, at level 70. Unlike the others, Bahamut changes your normal attacks, “Ruin” and “Tri-disaster” instead of “Gemshine” and “Precious Brilliance ”. Also, he will have a unique ability in which you order him to discharge a tactical nuke, I mean, an attack with 1,300 potency in the face of an unsuspecting person.

    Demi - Phoenix

  • Reaching level 80, Phoenix offers support options for you and the team. She also changes your main attacks, as soon as she is summoned, all allies in the area gain life regeneration, and she has a second healing ability with an “Excog” effect, which is an in-game acronym for a healing that happens if the target drops to 50% HP or less, or time runs out. And yes, she also has a tactical nuke in her pocket.

    Demi - Solar Bahamut

  • It’s currently the Summoner's ultimate ability, and it encompasses everything the other Demis do, only better. His tactical nuke hits more, can be invoked more times and, on top of that, has an area heal that is only available when he is on the field, in the form of “Lux Solaris”. It's quite common for people to forget to use it, as he's not always on the field when the team needs healing.

    Support and utilities

  • Apart from what the summons brings as support, the Summoner has a few more to bring to the team, the main one being the “Resurrection” spell, in which you can bring an ally back into the fight. But be careful: the channeling time for this spell is extremely long, but it can be ignored when using “Swiftcast”

  • Summoner also has a 5% attack bonus for the team in the form of “Searing Light”

  • And if things get really tough, you know that Carbuncle of yours that was forgotten when you got Summons that glow? It has its own ability to give you a shield equivalent to 20% of your maximum HP, with two charges.

    Ad

    Overall tips

  • If you're not confident that your team knows what they're doing, it's a good idea to save “Swiftcast” to resurrect someone quickly and save healers' mana.

  • If you die, the first thing you should do is summon Carbuncle back. 80% of what you do depends on it being activated to work.

  • A cool detail about the Arcanist is that it shares XP with the Scholar, who is a Healer, so when you level one, you level the other along with it.

    Thaumaturge/Black Mage - Free Trial - Initial
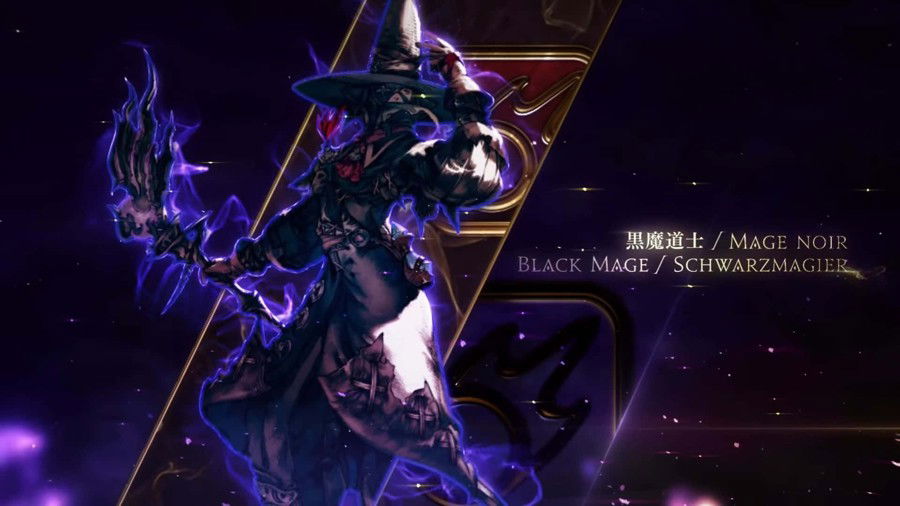
    “The Mage Noir” sounds really fancy to me
    “The Mage Noir” sounds really fancy to me

    Let's talk now about the infamous Black Mage, aka Thaumaturge. It’s commonly considered the most difficult job in the game, as its main mechanic requires you to stand still for most of the fight, and if you don't know the right places to stand... well, the boss prepares a cold pillow for you to lie on, flat on the floor.
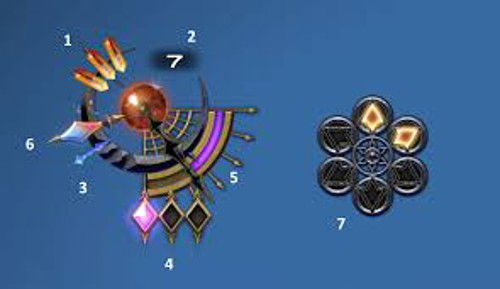
  • Now, how does Black Mage work exactly? This job works by interspersing fire spells for raw damage, electric spells for continuous damage and ice spells to recharge mana. This balancing works through the Astral Gauge below:

    It will still give you a lot of headaches.  / Source: Icyveins
    It will still give you a lot of headaches. / Source: Icyveins

  • At the beginning, you will only worry about numbers 1 and 2 in the image, which work as follows:

    Astral Fire and Umbral Ice

  • In item 1, for each fire pick, your fire spells do more damage, but they also consume more mana and prevent mana regeneration, and fire picks do the opposite with ice spells, making them consume less mana, but cause less damage and make ice spells generate an absurd amount of mana.

  • Ok, but how are these “picks” generated? It's simple: fire spells (Fire 1, Fire 2 and Fire 3) will be your main sources for this, and the same goes for generating ice “picks”, when using Ice 1, Ice 2 and Ice 3. Keep in mind that all of these spells I mentioned have a channeling time of two seconds;

  • With this, you have two clear phases of rotation, which would be fire and ice. And how does the thunder damage part work? Every time you activate or change elements, a “Thunderhead” stack will be generated, which allows you to use Thunder or its area damage equivalent, which are instant Spells.

  • It's item 2 where it really starts to get complicated. Whenever you enter the ice or fire phase, a 15-second timer will begin, which is reset whenever you generate a pick corresponding to the phase you are in. Up to level 60, it won't bother you much, but when you get here, you will have your main damage Spell - Fire 4 - and it doesn't generate Astral Fire, that is, it doesn't reset the timer, and if it resets while you are channeling Fire 4, you just lose the spell and nothing happens. The same goes for Ice 4, but the ice phase is very short.

    Umbral Hearts

  • In item 3, you can generate three ice stakes when using Ice 4 or Umbral soul post-level 58. These stakes make you ignore the increased mana cost generated by Astral Fire, allowing to use more Fire 4, during the fire phase;

    Ad

    Polyglot and you

  • Items 4 and 5 work together, and are unlocked at level 70. As long as you have Astral Fire or Umbral Ice active, every 30 seconds, a stack of Polyglot will be generated, and it carries the strongest spells of the job, them being Foul for area damage and Xenoglossy for single target.

  • Foul, at first, requires channeling, but at level 80, with the release of Xenoglossy, both become instantaneous, making them excellent locomotion tools.

    Paradox

  • Item 6 brings an upgrade to the Fire 1, in the form of Paradox. Whenever you change elements, Fire 1 becomes Paradox and has additional effects depending on which phase you went to. If it went from fire to ice, Paradox costs no mana and generates Umbral Ice, and if it went from ice to fire, it generates Astral Fire and guarantees the activation of Firestarter, which translates into a free use of Fire 3.

    Flare Star

  • Item 7 has the most controversial addition to the job, known as the Flare Star. By itself, it’s already difficult to execute all Fire 4s within the fire phase, and now it’s possible to be punished if you miss at least one cast: Flare Star can only be used if you have used seven Fire 4s, or two Flares in a single fire phase, because when leaving Astral Fire, the Flare Star stacks are reset.

  • The channeling animation for this spell is gorgeous, but it still gives you a headache having to worry about using it;

    Channeling a gift here...
    Channeling a gift here...

    Support and utilities

  • Your support is only for yourself, and your team can fend for themselves.

  • Your main tool, apart from blowing things up around you, is your Ley Line (Level 52). It’s a small area which reduces the channeling time of your spells by 20%. However, it’s fixed and takes two minutes to recharge, so be careful where you place it;

  • "Umbral Soul", unlocked at level 35, is your tool for when there are no enemies. While in the ice phase, you can use Umbral Soul, which is a GCD, to lock the counter and generate ice "picks."

  • It's also worth mentioning "Transpose", which allows you to swap elements. Upon using it, you will go to the opposite element, with a pick enabled. At higher levels, you won't need to use "Transpose" as much, except in some cases to boost power, but that's going beyond the basics.

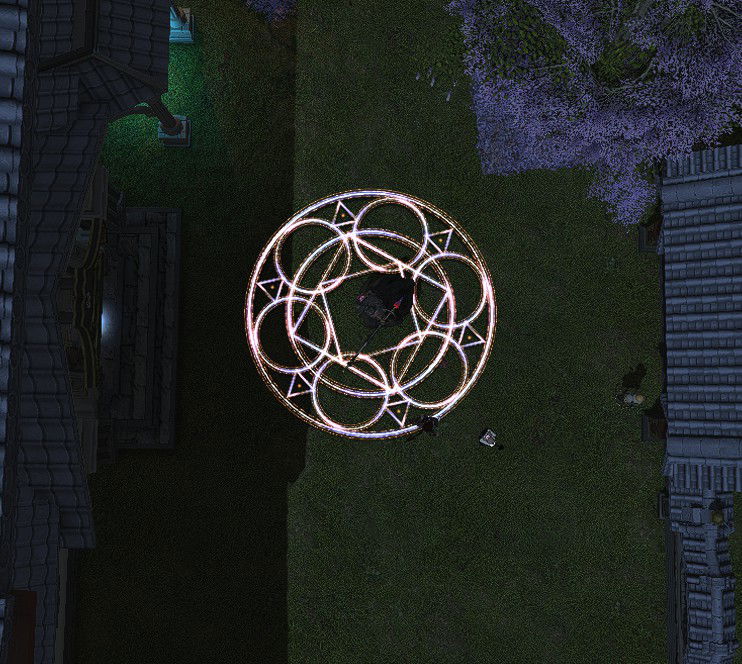
    Legend has it that this circle makes bosses want to throw all their AoE attacks there, but I can't confirm
    Legend has it that this circle makes bosses want to throw all their AoE attacks there, but I can't confirm

  • Regarding movement, you have “Between the Lines” and “Aetherial Manipulation”. Between the Lines makes you teleport to an active Ley Line and the range is very long, Aetherial Manipulation is the same thing, but you teleport to a player you select. In the worst case, at level 96, you gain an ability to remake a misplaced Ley Line wherever you are at the moment;

    Overall tips

  • Using Swiftcast when using Flare, Fire 4 or Flare Star gives you a small DPS boost;

    Ad

  • At level 66, you gain an ability called Triplecast, which is basically a triple Swiftcast, and has two charges. It's a good idea to save at least one charge for when you need to move or to use more spells within ally buffs.

  • The teleportation skills I mentioned have very short cooldowns, so, if you already have a certain control over the fight, you can even just move using them and the Slidecast;

  • Black Mage may have simple mechanics, but applying them is difficult. Always pay attention to the best places to stand in each fight to get the best out of the job in each encounter.

    Red Mage - Free trial - LV 50

    Waiting for Yoshi-P to give hats to Vieras
    Waiting for Yoshi-P to give hats to Vieras

  • En garde! Here is your melee mage, who can do well even when the mana runs out, or not. Red Mage is highly sought after by those who enjoy a very mixed job, between sword strikes and magic, and its essence is that of the “Spellblade” that exists in the most different games.

  • Because it’s not a starting job, the game already assumes that you know the basics of casters, and then it just gives you a quick tutorial on how the main mechanics of the job work, which we will break down below:

    Dualcast

  • It’s a passive that will accompany you at all levels, which consists of the following: whenever you channel a spell, a “Dualcast” stack will be generated, causing your next spell that has channeling to come out instantly. Yes, it has a pseudo “Swiftcast” as a passive!

  • The ideal is to always use them in Spells that have a longer casting time, for example, Veraero and Verthunder, which have a 4-second cast. In other words, the basics of rotation are to use a fast Spell, like Jolt, and then use a slow one with Dualcast;

  • As you use elemental spells, they can generate stacks, which allow using a quick elemental spell. For example: when using Verthunder, there is a chance of gaining a use of Verfire and Veraero has a chance of enabling Verstone. These two skills deal more damage than Jolt, and paying attention to the adjustments of these stacks makes the rotation very dynamic;

    Black Mana and White Mana

  • If you've played other Final Fantasy games, you may already have an idea of ​​which spells follow the White and Black mana lines. The Red Mage is capable of using its own versions of Black Mage and White Mage spells, and knowing how to balance them unlocks the melee finisher.

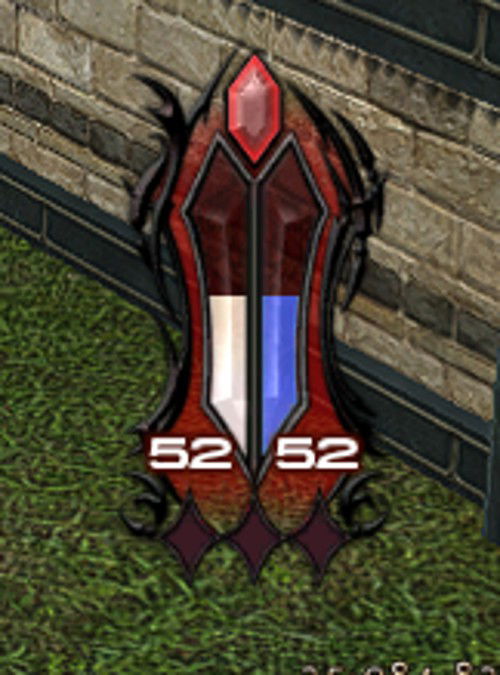
    Red Mage mana meter
    Red Mage mana meter

  • As you use spells belonging to White or Black mana, this counter will increase, however, be careful to keep the mana balanced. If you use too much of one type, the counter will count less of the other type the next time you try to use it, delaying your melee combo.

  • Of the spells that generate White Mana, we have: Veraero and its upgrades, Verstone and in the future at level 70, VerHoly.

  • Of the spells that generate Black Mana, we have: Verthunder and its upgrades, Verfire and in the future at level 70, VerFlare.

    Ad

  • Jolt and its upgrades and Scatter are neutral Spells, which generate both mana, but generate less than when you use a spell focused on one type of mana.

    Melee combo

    Z is for Zueira
    Z is for Zueira

  • When you acquire 50 of each type of mana, you’ll be able to fight your enemies. It's a simple combo using the Weaponskills “Enchanted Riposte” > Enchanted Zwerchhau” and then “Enchanted Redoulement”. If you are in a situation with multiple enemies, just use “Enchanted Moulinet” three times.

  • From level 70 onwards, each use of these Weaponskills using the mana bar will generate a mana counter, and when you get 3, VerThunder will transform into VerFlare and VerAero will transform into VerHoly. For every 10 levels after 70, a new combo will be added to Jolt to be used right after VerHoly/VerFlare, thus ending your melee stage.

    Support and Utilities

  • Red Mage is the caster with the most support options in the game, excluding Blue Mage, as it’s basically a separate game.

  • Remember the Dualcast passive? The Red Mage, like the Summoner, has a Spell to bring allies back from level 62, with that long channeling time... but then you have that passive Swiftcast always on, so you can bring any ally back quickly, as long as you have the mana available.

  • If you don't have a healer nearby, Red Mage has VerCure, which is a healing spell that offers a modest amount of HP and can be used indefinitely as long as you have mana available

  • Red Mage also brings mitigation to the party in the form of “Magick Barrier”, which reduces magical damage received by the party by 10% and increases healing received by 5%.

  • And as for movement, it has a lunge to be used to get closer during the melee phase and a back jump to retreat and get out of danger.

    Overall Tips

  • It may not seem like it, but Red Mage burns a lot of MP, so it's good to use Lucid Dreaming occasionally.

  • Always keep an eye on the healer or tanker. As you can bring them back quickly, your reaction can save the team from defeat.

  • I know it's tempting, but don't use the melee combo without having Black and White Mana. They do little to nothing if they don't have enough charge.

    Pictomancer - Dawntrail - LVL 80

    Where are my hats, Yoshi-P?
    Where are my hats, Yoshi-P?

    If you found Black Mage too difficult, Pictomancer is here to cover your need to delete enemies with spells. The job consists of bringing drawings to life and transforming your art into tools to be used in favor of allies and against your enemies.

    Basic combo

  • Pictomancer is not just about the drawings. While they are not ready to use, you have “Fire in Red”, basically three skills on one button. Each time it’s used, the button itself changes and becomes the next spell in the combo, which in this case is “Aero in Green”

  • The same goes for your area combo, starting with “Fire II in Red”, going to “Aero 2 in Green” and so on. It’s worth mentioning that it’s possible to alternate between the single target and area combo without losing the bonus, for example: area attack, single target, area attack. Doing this doesn’t cause you to lose the bonus!

    Ad

  • Whenever you finish one of these combos, you’ll gain a stack of white paint, which allows you to use “Holy in White”, which is an instant area attack, great for when you need to move.

  • Finally, with each use of the combo, you generate 25 charges, and with 50 charges, you can use the “Subtractive Palette”, which enables a stronger combo to be used, but following the same pattern you’re already doing, starting with “Blizzard in Cyan” for single target and “Blizzard II in Cyan” for area attack

    Drawing

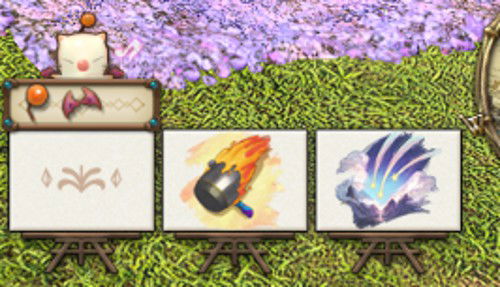
    Pictomancer artbook, with “Pom Motif”, “Hammer Motif” and “Landscape Motif” prepared
    Pictomancer artbook, with “Pom Motif”, “Hammer Motif” and “Landscape Motif” prepared

  • Pictomancer has 3 design categories, namely: “Weapon Motif”, “Creature Motif” and “Landscape Motif”.

  • It’s recommended that drawings be prepared outside of combat, as they’re made instantly outside of combat. On the other hand, if you’re already in the middle of a fight, it takes 3 seconds of channeling to prepare a drawing.

  • It's good to be aware that even if you prepare a drawing, they have a cooldown to be activated, for example, the “Landscape Motif” can only be used once every 2 minutes, even if you draw it beforehand, you’ll still have to wait for this recharge.

    Weapon Motif

  • When you use “Weapon Motif”, a sledgehammer appears in your book to be used by the “Hammer Stamp” skill, which translates into three GCDs of area hits with guaranteed and instant critical, making this skill a good tool locomotion;

    Creature Motif

  • These drawings are the Pictomancer's oGCDs. Yes, plural, as the “Creature Motif” changes with each use, for example: It starts as “Pom muse”, which causes balls to fall on enemies, then this same ability becomes “Wing Motif”, in which you draw a bat to hit enemies! And there's more, right after, a finisher is a skill in the form of the “Moogle of the ages” which is an even stronger oGCD.

    When the “Mog of the Ages” is ready, he appears to say “hi!” in your artbook
    When the “Mog of the Ages” is ready, he appears to say “hi!” in your artbook

  • At higher levels, a whole new sequence of drawing is unlocked within this motif, so the visuals are constantly changing during the rotation.

    Landscape Motif

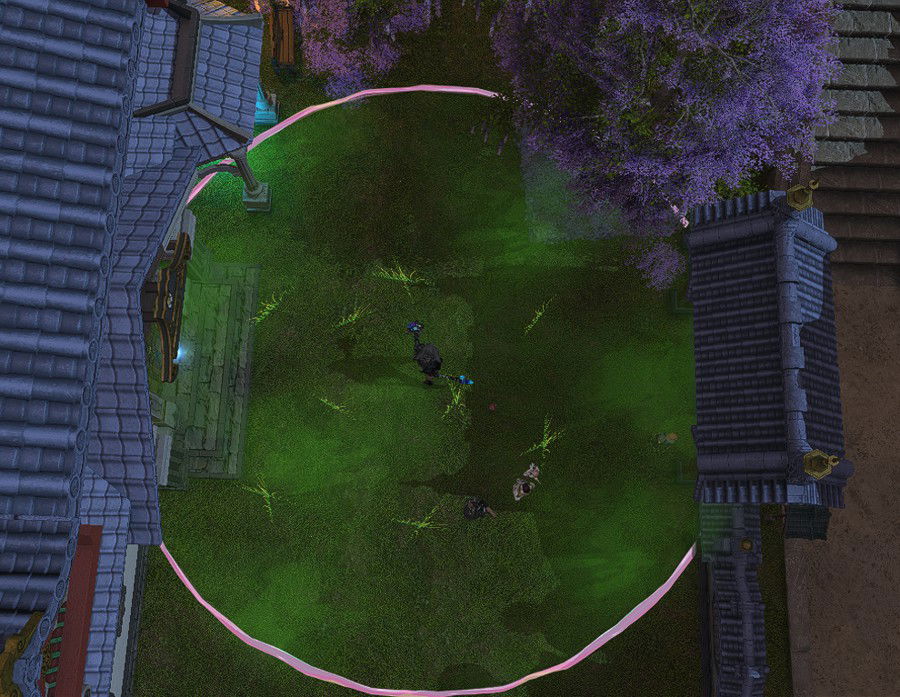
  • Also known as “Starry Muse”, this drawing creates an area in which, as soon as it appears, you and the entire team gain 5% bonus damage, but your team doesn’t need to be in the area to receive the buff. Additionally, channeling time is reduced by 25% while you are within the lawn area.

    Unlike Black Mage's Ley Line, here you even have room to maneuver
    Unlike Black Mage's Ley Line, here you even have room to maneuver

    Support and Utilities

  • Even though it has the potential to deal devastating amounts of damage, the Pictomancer has a whole range of uses at its disposal, starting with movement, we have “Smudge”. This ability makes you take a short dash to wherever the character is looking, and at higher levels, it even gives you a movement buff after use;

    Ad

  • Despite having already mentioned it, it’s worth remembering that the “Landscape Motif” gives a 5% damage buff to you and the entire team!

  • Additionally, the Pictomancer can give themselves a shield in the form of “Tempera Coat” and if it’s broken by damage, its cooldown is halved. At higher levels, the Pictomancer can distribute this shield to his allies!

  • As if all this range of uses weren’t enough, the job’s maximum finisher, which can only be used every 2 minutes, Star Prism, in addition to dealing ridiculously high damage, offers area healing for the group.

    Overall Tips

  • When preparing drawings during combat, “Swiftcast” can be used to draw instantly!

  • Following on from the last tip, if you use “Swiftcast” to draw the “Wing Motif” or “Maw Motif”, you create the perfect window to use the corresponding drawing and the “Mog of the Ages/Retribution of the Madeen” while the GCD recharges.

  • Be careful when using “Smudge”. It’s easy to miscalculate and slide into an abyss.

    Conclusion

    With that, we conclude this cut of the casters. The objective of this article was to show how the basic mechanics of each of them work, but without making it too complicated and providing the opportunity for those who want to delve deeper, to have more to learn about the job. Remember that it’s always better to dedicate yourself to a job that you like, and not to the one that is currently the best at doing X, Y or Z.