Final Fantasy

guía de juego

Final Fantasy XIV: Guide to Ranged DPS

, Comment regular icon0 comments

So, you want total mobility, dancing while spreading chaos and destruction from a distance? You've come to the right place! In this guide, we will cover the main mechanics of Ranged DPS!

Writer image

traducido por Meline Hoch

Edit Article

So, you want total mobility, dancing while spreading chaos and destruction from a distance? You've come to the right place! In this guide, we’ll cover the main mechanics of Ranged DPS and share valuable tips for you to shine with each of them!

Weaving and use of GCD

One thing that Final Fantasy XIV does very well is give you the false feeling that you are killing it on damage, and when you analyze the statistics, you did less damage than the Healer. To prevent this from happening, it’s good to keep these two concepts in mind: “Weaving” and “GCD”.

Ad

  • Starting with “GCD”, it stands for “Global Cooldown”. In practice, whenever you use a Weaponskill or Spell, all others go on a short cooldown, usually something like 2 to 2.5 seconds. The secret is to always keep this “GCD” running.

    Note that, when using a skill, several skills also went on cooldown
    Note that, when using a skill, several skills also went on cooldown

  • Now that you know about “GCD”, let’s talk about “Weaving”. As seen, not all skills enter this “GCD” cooldown time and that’s when we start using “Off-Global Cooldowns” or “oGCDs”, and in doing so, we do what is known as “Weaving ” which is to use an ability during global cooldown so as not to lose damage.

  • As a rule, and depending on your connection, it’s possible to use two skills within this cooldown. Keep in mind that these skills generate a short animation lock on the character, preventing them from using another skill. Learning to use this effectively makes a difference in your damage in the end.

    Combo Actions and “Procs”

  • Ranged DPS work with a system of “Combo Actions” and “Procs”. “Combo Actions” occur when attacks are used in a certain order, and so they gain additional effects, such as offering buffs and extra damage, and “Procs” are skills that are available for use at random, for example: using X skill has a 40% chance of enabling Y skill to use. Dancer and Bard work a lot with this system, while Machinist uses more “Combo Actions”

    Combo Actions

  • “Combo actions” are basically combos pre-determined by the game, and when followed, they offer bonus damage if it’s done correctly, for example:

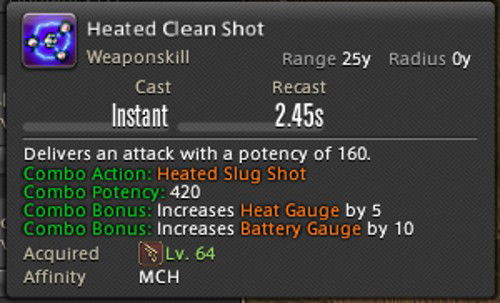
    This ability has a bonus if used right after “Heated Slug Shot”
    This ability has a bonus if used right after “Heated Slug Shot”

  • If you use this skill without the combo, it hits with 160 Potency, and if used with the “Combo Actions” bonus, it hits with 420 Potency and generates resources to be used in other skills.

  • This type of combo is normally called “Combo 1-2-3” because it consists of three skills to always be used in the same sequence.

    Procs

  • “Procs” comes from the English expression “Random Procs”, which is an ability that’s activated at random. In FFXIV, there are some skills that follow this pattern, such as:

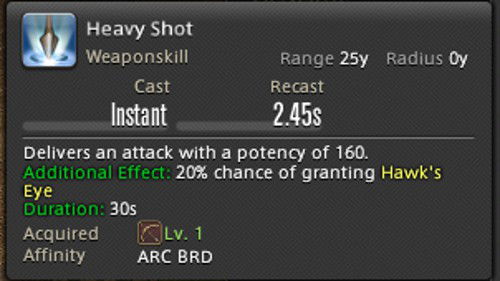
    This is Archer/Bard's first ability
    This is Archer/Bard's first ability

  • This attack has a 20% chance of activating a buff, and this buff allows you to use 2 attacks ("Straight Shot" for single target and “Wide Volley” for multiple) that are stronger versions of the ones you have available at all times. When using one of these attacks, the buff is expended.

  • It's also worth mentioning that it's not possible to accumulate these buffs, so whenever you get it, it's a good idea to immediately use the improved attacks. This mechanic constitutes the Archer/Bard and Dancer gameplay.

    Role Actions

    Head Graze

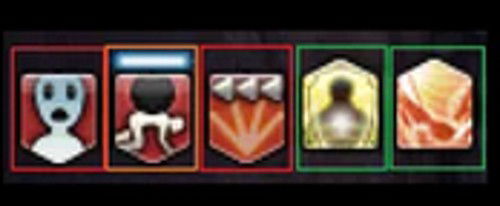
  • It’s quite common for new players to think that “Stun” and “Interrupt” are the same thing, because at the initial levels, the enemies have no immunity to “stun”. But this changes very quickly, and abilities that can be interrupted are good to interrupt, as they often have a devastating effect on the group. In the example below, this Dark Mist ability generates an area where players within it are unable to move or use abilities for five seconds. To identify whether an attack can be interrupted, pay attention to the glow around its charge.

    Ad

    Ability which can be interrupted
    Ability which can be interrupted

    Ability which cannot be interrupted
    Ability which cannot be interrupted

  • It’s worth mentioning that, unlike Tankers, who need to be close to the enemy to use “Interrupt”, Ranged DPS can do this from a relatively long distance and without taking any risks.

  • All jobs in the game share some skills with other jobs of the same category. For example, all 4 tankers have a common skill set. These fall within the “Role Actions” category, and for Ranged DPS, we have:

    Second Wind

  • Second Wind has the vital function of preventing you from being dismissed from the world of the living. Second Wind offers a humble heal at lower levels, but it can make the difference between you surviving a wide raid or not. Around level 94, Second Wind gains an upgrade, which gives more robust healing, which, on a critical hit, can heal up to 40% of your total HP, given the right circumstances.

    Arm’s Length

  • Commonly used by Tankers as mitigation in “Big Pulls” (I did complete coverage of how to tank here on the websitelink outside website!), this ability can also be used by Ranged DPS to avoid knockbacks.

  • Arm’s Length has two functions: when hit by an enemy, it slows them down, making them launch auto-attacks more slowly. Additionally, while it’s activated, you cannot be pushed back by most attacks. Focus on the “most” part.

  • How do you know if knockback immunity works or not? Well… trial and error. One situation in which it doesn't work at the beginning of the game is the Titan's charged punches, right at the level 30 Trial. As you progress through the game, you'll discover where you can and can't use it, and where it's actually worth using it. There are cases where, to perform a mechanic, you need to be pushed and, if you're not... you take home a vulnerability.

    Foot Graze

  • It’s an extremely situational ability. It roots an enemy for 10 seconds, which is great, but the effect ends if they are attacked. It’s interesting to be used in situations where a tactical retreat is a good idea.

    LegGraze

  • Similar to “Foot Graze”, it applies a slowing effect to the target; however, the effect doesn’t end when the enemy is attacked. It has its uses, just like “Foot Graze”, but overall, it's still a situational ability.

    Peloton

  • By far the most used Role Action in the game. The reason? It gives more movement outside of combat for 30 seconds and the cooldown is just five seconds. It's always good to use and there are no penalties for it, plus your party will love the extra movement to the next group of enemies or the boss.

    Which is the Ranged DPS for you?

  • Let's evaluate our options, but remember that here I’ll consider the entire job kit up to level 100. There are a total of 3 Ranged DPS in the game, one of which is only for those who have the game and its expansions, Dancer. So, let's start… at the beginning!

    Ad

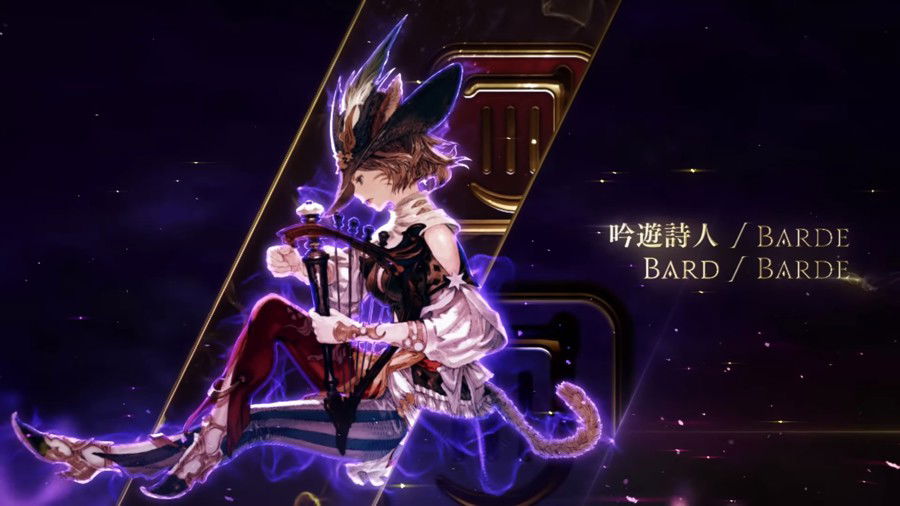
    Archer/Bard - Starter - Free Trial

    I didn't have an idea for a photo of Bard, so I'll play the world’s smallest violin for you
    I didn't have an idea for a photo of Bard, so I'll play the world’s smallest violin for you

  • If you want to start in this role right away, Archer/Bard is there for you. Their gameplay mainly consists of three things: “Hawk's Eye”, their Dots (Damage over time) and their music. Furthermore, you have two oGCDs to use between the skills, which are “Bloodletter” for single target and “Rain of Death” for multiple. Don't worry, it may seem like a lot, but the synergy between them makes everything very natural. So, let's go in parts and follow their unlocking line.

    Hawk’s Eye

  • Archer/Bard's Procs appear very early in leveling, at level 2 with the “Straight Shot” skill. Whenever you use your initial attack, the “Heavy Shot”, there’s a 20% chance of gaining a buff called “Hawk's Eye”, which allows you to use the “Straight Shot”. This mechanic will also be applied to other skills in the kit, such as a variant to be used on multiple enemies

    Your Poisons (DoTs) and You

  • For those who enjoy handling and administering this type of damage, Archer/Bard is the job that best works with damage over time. Having 2 DoTs that must be kept on enemies for as long as possible, namely “Venomous Bite” and “Windbite” and their higher level variants.

  • Complementing the poison kit, at level 56 there is the “Iron Jaws” attack which resets the duration of active poisons on the target, and also has a 35% chance of activating “Hawk's Eye”

    Songs

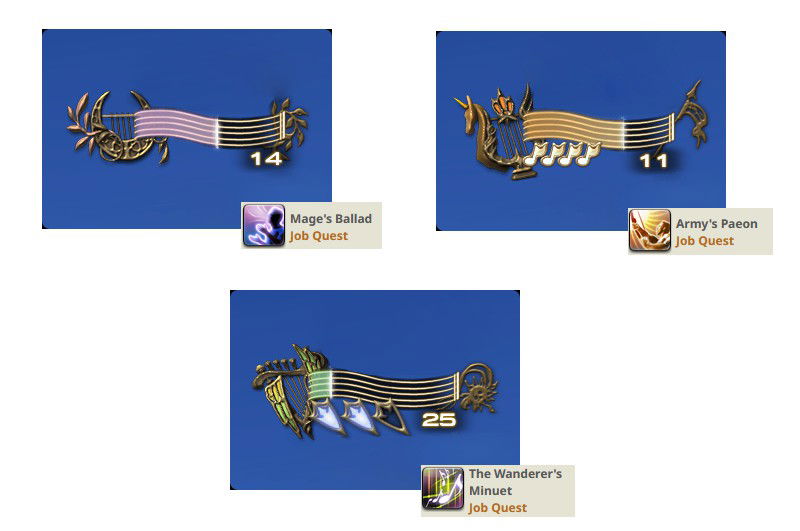
    Each song alters your meter, so you don't get lost so easily in which one is active
    Each song alters your meter, so you don't get lost so easily in which one is active

  • In the complete kit, Bard has three songs that, if used correctly, can keep the entire party with some type of buff 100% of the time. Each song lasts 45 seconds and offers a small change in your rotation, creating phases in which the rotation becomes more intense and others are calmer. It’s worth mentioning that only one song can be active at a time, so if you activate one while another was already active, it will be overridden by the new one.

  • Starting with the initial song, we have “Mage's Ballad”. While active, you and your party gain 1% more damage. Its “Repertoire” effect means that, every second, there’s an 80% chance of the cooldown of your oGCDs (“Bloodletter” and “Rain of Death”) having the cooldown reduced by 7.5 seconds. Yes, you become a machine gun full of arrows when this song is active.

  • “Army's Peon” is the second song to be unlocked, and it offers you and the party 3% more Direct Hit (a pseudo critical) and its “Repertoire” effect, just like in Mage's Ballad, has 80% chance to activate, and it reduces your GCD by 4%, making you able to use your basic attacks slightly faster

  • And to close off, we have “Wanderer's Minuet” which offers 2% more critical chance for you and your entire party, in addition to its “Repertoire” effect, which differs a little from the others. Still following the 80% activation chance, whenever it’s activated you gain a stack, which can accumulate up to 3. These stacks enable and strengthen a new area oGCD known as “Pitch Perfect”. The ideal is to accumulate the 3 stacks and use them; however, it’s worth mentioning that these stacks only stay with you while the “Wanderer's Minuet” is active, and are lost if not used once the song ends.

    Ad

    Support and utilities

  • In addition to the numerous buffs that the songs bring, Bard also has “Battle Voice”, which offers 20% Direct Hit to all party members and at higher levels, also has “Radiant Finale” which, if used correctly, gives 6% more damage to the party

  • Moving now to the line of defensive buffs, Bard has “Nature's Minne” which increases the party's healing by 15%, which is good for recovering from large damage, and “Troubadour” which offers 10% mitigation of damage to everyone in the party and 15% damage reduction at higher levels.

  • one thing unique about Bard is that it’s the only non-healer who can cure debuffs, with “The Warden's Paean” skill which clears a debuff, and if the ally doesn’t have a debuff, puts protection on them so that if they receive any removable debuff within 30 seconds, they’ll be automatically healed.

    Here you can see some types of debuffs/buffs. Note that Buffs have an upward arrow and debuffs have a downward one. What can be healed by the Warden's Paean is the one with that white stripe on top
    Here you can see some types of debuffs/buffs. Note that Buffs have an upward arrow and debuffs have a downward one. What can be healed by the Warden's Paean is the one with that white stripe on top

  • Although not used much, the Archer/Bard has the “Repelling Shot”, which is basically a short jump backwards in relation to a target.

    General Tips

  • While in dungeons and the Tanker is pulling enemies, distribute your poisons among them and use your area attacks when they stop. If they don't do a “Big pull”, don't worry about the poisons and go straight to the area attacks.

  • Once you have all 3 songs, remember that each one lasts 45 seconds, but you don't need to use the entire length of each one. “Army's Peon” is generally used as a transition song. Open the fight with “Mage's Ballad”, then go to “Army's Peon” and when there are approximately 45 seconds left for the “Mage's Ballad” to recharge, you use the “Wanderer's Minuet” overriding “Army's Peon”

  • I hope you don't need to do this, but it's good to remember that “Nature's Mine” improves all heals, “Second Wind” included. So, in a tighter situation, you can use this combo to try to save yourself.

    Machinist - LV 30 - Free Trial

    FF XIV, your typical medieval game with spells... and this shotgun over here
    FF XIV, your typical medieval game with spells... and this shotgun over here

  • Firstly, to unlock this job, you must have reached Heavensward, that is, finished the base game and its post-patches. With that explained, let's go to the job which, unlike the Archer/Bard and Dancer, doesn’t offer any buff to the party, being categorized as a “Pure DPS”, along with Samurai, Viper and Black Mage

  • As explained in the Combo Action section, Machinist works with a 1-2-3 combo that powers two gauges: “Battery Gauge” used to summon combat drones, and the “Heat Gauge” which enables an overload mode, which in turn enables fast attacks with more damage.

    In parentheses is the name of the skill before the upgrade
    In parentheses is the name of the skill before the upgrade

    Ad

    Ricochet and Gauss Round

  • These two skills mentioned are the main oGCDs of the job, and should be used whenever possible, respecting the GCD so as not to “clip” its recharge. Depending on your latency, you can use one or even two oGCDs without preventing the use of the next GCD.

  • It’s worth mentioning that when “Hypercharge” is used, and you start using the “Heat Blast” overload attack, for each use, both “Ricochet” and “Gauss Round” have their reload time reduced by 15 seconds, so remember to spend them so you don't miss this top-up!

    Battery Gauge and Heat Gauge

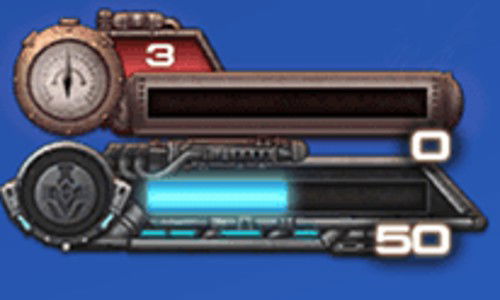
    Heat Gauge on top and Battery Gauge on the bottom
    Heat Gauge on top and Battery Gauge on the bottom

  • Whenever you finish the “1-2-3 combo” or use the “Hot Shot”, you fill these meters. When it reaches 50, you can spend the Battery Gauge to summon a drone that helps you in combat, but the higher the meter when used, the more damage this drone causes, so it's good to evaluate the situation when using it.

  • In parallel, the Heat Gauge can be used to enter an overload state I mentioned earlier, in which you strafe an enemy with the Heat Blast, which then recharges your oGCDs, and makes you fire even more bullets at your targets.

    Reassemble

  • One of Machinist's main abilities, it makes his next GCD guaranteed Critical and Direct Hit. Ideally, it's good to use it in your strongest attacks, like Drill and Air Anchor, and if you don't have them yet, use it in Clean Shot.

    Support and Utilities

  • Despite being a “Pure DPS”, Machinist has two skills to provide strength in tight moments. “Tactician” is a 10% damage mitigation, which at higher levels increases to 15%, and also has the exclusive “Dismantle”, which is a debuff that reduces an enemy's damage by 10%, very useful in Alliance Raids, as you end up affecting other parties with this mitigation.

    General tips

  • Don't save your skills too much. A big difference with Machinist is that your core skills feed on itself: the more you use your skills, the more often they will be available for use. The one exception to this tip is Reassemble, which is best saved for powerful attacks.

  • Depending on the situation, it’s good to call the Battery Gauge turret with a little more than 50 on the counter. An example of this is you have a counter of 40, about to finish the basic combo to go to 50, and the “Hot Shot” is almost available again. In this case, it's a good idea to finish the combo, use the skill and call the turret with 70 Battery Gauge.

    Dancer - LV 60 - Shadowbringers

    You play Dancer, I play as a “Pagodeiro”, we are not the same
    You play Dancer, I play as a “Pagodeiro”, we are not the same

  • If you're the type of person who enjoys going on adventures with a friend and providing support specifically just for them, this is your job. An easy way to look at it is that Dancer is the opposite of Bard. Instead of keeping the entire group buffed 100% of the time, Dancer focuses the majority of their buffs on a single other player and, in return, that player helps them fill up one of their counters, the Esprit Gauge;

    Ad

    Closed Position

  • I set aside a topic just for this skill, because it’s the most important in the job kit. When you use it on an ally, it causes all the buffs that your abilities apply to you to also be applied to the player of your choice. Therefore, always remember to use it if it’s available at the level you are at.

    Between combos and dances

  • Dancer uses a mix of “Combo Actions” with the “Procs” that I mentioned before, with every attack having a chance to generate a buff that allows the use of a stronger blow. It seems complicated. But it becomes easier if we look below:

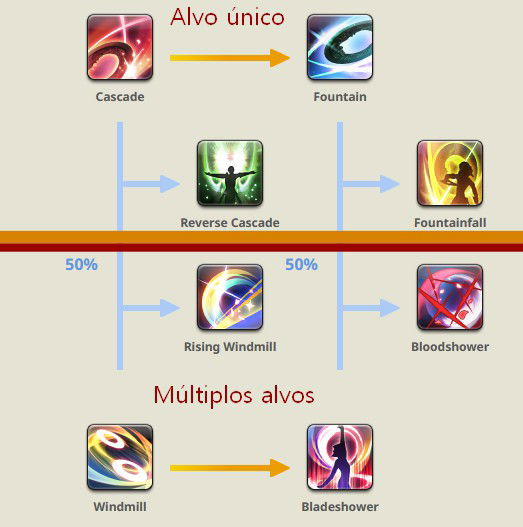
    “Cascade” and “Fountain” are always available, as are “Windmill” and “Bladeshower”, and they have the chance to unlock the use of the others
    “Cascade” and “Fountain” are always available, as are “Windmill” and “Bladeshower”, and they have the chance to unlock the use of the others

  • With the image in mind, notice that “Cascade” and “Fountain” are your basic single target combo. Whenever you execute them, you have a chance to enable the combos in the middle part of the image for use, which are more powerful attacks. Keep in mind that, just like Bard, as soon as one of these middle ones is used, the buff is spent, and they cannot be performed until another buff is obtained.

  • It’s also worth mentioning that whenever one of these buffs is spent, there is a 50% chance that it will generate a stack of “Fourfould Feathers”, which supply the job’s offensive oGCDs, and spending these oGCDs has a 50% chance of generating a new stack from “Threefold Fan Dance” - another oGCD. Yes, it’s a “Proc” on top of a “Proc” on top of another “Proc”. This makes the Dancer's rotation very dynamic and not very repetitive.

  • Now about the dances, which at first is just “Standard Step”. Whenever you use it, all your GCDs will be converted into dance moves that do no damage. From there, just follow which step is highlighted, as if you had a “Combo Action” bonus. Just use two of these dance steps and reuse the “Standard Step” button, which is now the “Standard Finish”, an area attack with very modest damage to compensate for the time you didn't deal any, and gives you a buff damage up to 5%. Your chosen partner also gets this buff!

  • At higher levels, there’s the “Technical Step”, which works like an advanced version of the “Standard Step”, requiring four steps to be taken to have its full effect, and instead of being limited to you and your partner, the “Technical Step” buff goes to the entire party, and it adds to your “Standard Step” which is on you and your partner.

    Support and Utilities

  • To begin with, let’s go with the “En Avant” skill. Reading it, it may not do much, but in gameplay it makes a lot of difference. It’s an attack that has no usage requirements and can accumulate up to three charges at higher levels. It can easily get you out of an area attack or out of a danger zone.

  • Going to buffs now, the main buff it offers is Esprit. When the Standard Step is used correctly, the Dancer and his partner gain the Esprit effect, in which they both gain 5% more damage, and this buff can easily be kept active at all times, as it lasts 60 seconds and can be used every 30 seconds.

    Ad

  • In addition, the Dancer also has Devilment, which gives the user and their partner an additional 20% critical and Direct Hit chance, and Technical Step, which gives an additional 5% damage to the entire party if used correctly.

  • This job also has two forms of healing. Curing Waltz heals a small area around the Dancer. It doesn't do much on its own, but if you have an active dance partner, the effect is doubled on them and can be added to yours, effectively doubling the healing effects if you are together.

  • Improvisation works like a channeled cure. When using this skill, you cannot move or attack, in return, you create a healing area around you and generate some stacks that can be used to offer a shield to the party if they are spent before the dance ends.

  • To conclude, like the other two, Dancer also has an area mitigation in the form of Shield Samba, which reduces the damage the team takes by 10%, increasing this reduction to 15% at higher levels.

    General Tips

  • Use and abuse Standard Step. Whenever it recharges, use it.

  • I highly recommend that “En Avant” be placed on an easily accessible key. This ability is great for using as a panic button to try to get out of an area attack.

  • Regarding dances, remember that they are an area attack around the player and not the target, so if you are too far away, there’s a chance that the attack will not stick and will be spent.

    Practicing

    Hall of Novice

    With your ranged DPS chosen and being at least level 10, I highly recommend you do the Hall of Novice activity circuit. There, the game itself will place you in a controlled environment to practice everything I mentioned in the first topic of this article.

    To access the Hall of Novice, simply look for the Smith Npc located in the adventurers guild in each of the 3 main cities or through the Duty Menu > Hall of Novice.

    Conclusion

    With that, we conclude this breakdown of Ranged DPS. The objective of this article was to show how the basic mechanics of each of them work, but without making it too complicated and providing the opportunity for those who want to delve deeper, to have more to learn about the job.

    Remember that it’s always better to dedicate yourself to a job that you like, and not to the one that is currently the best at doing X, Y or Z.